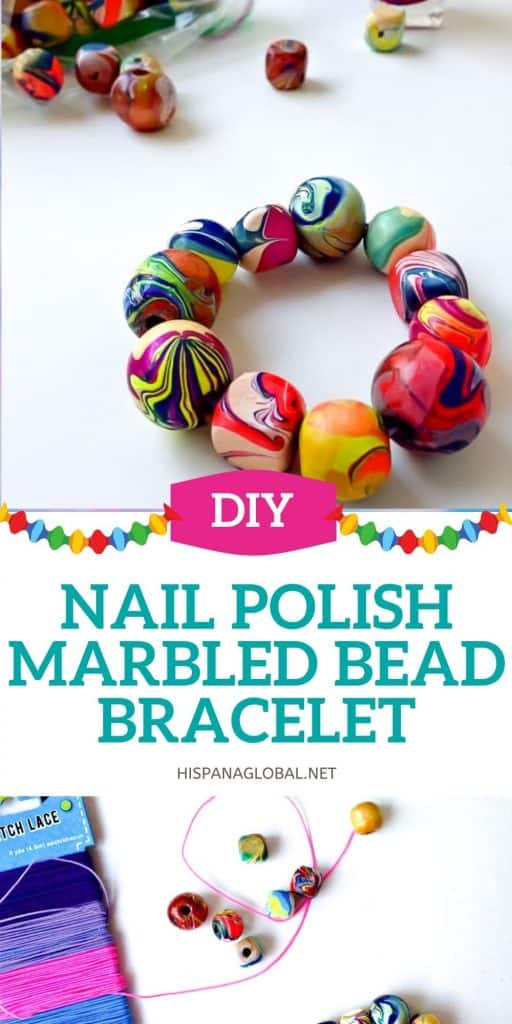
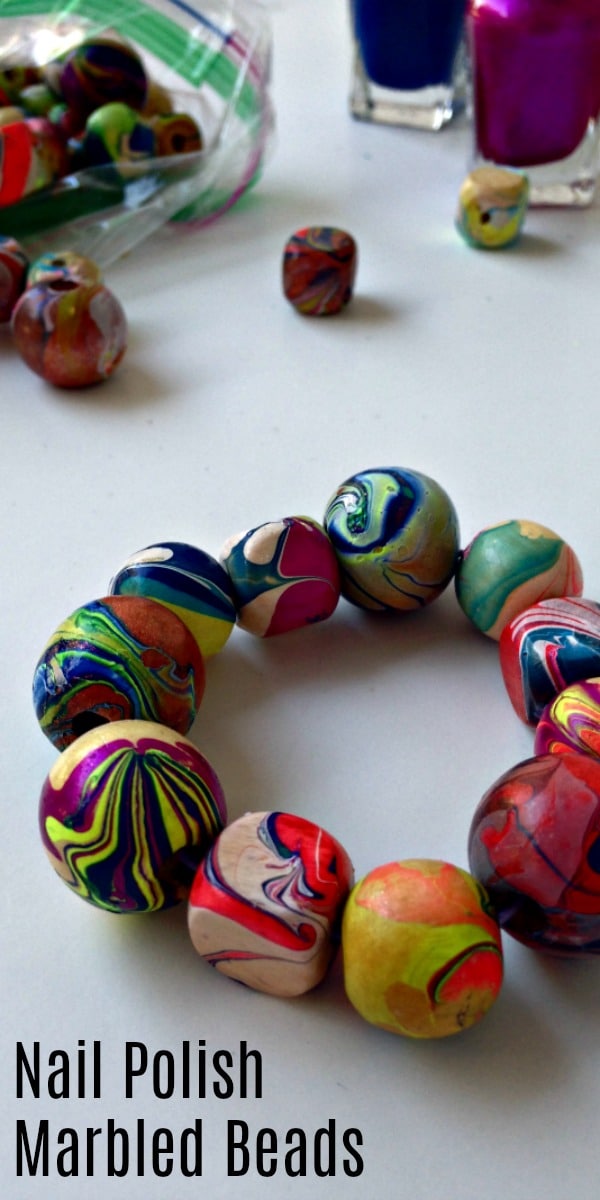
VIDEO: Nail Polish Marbled Beads and Bracelet Craft DIY
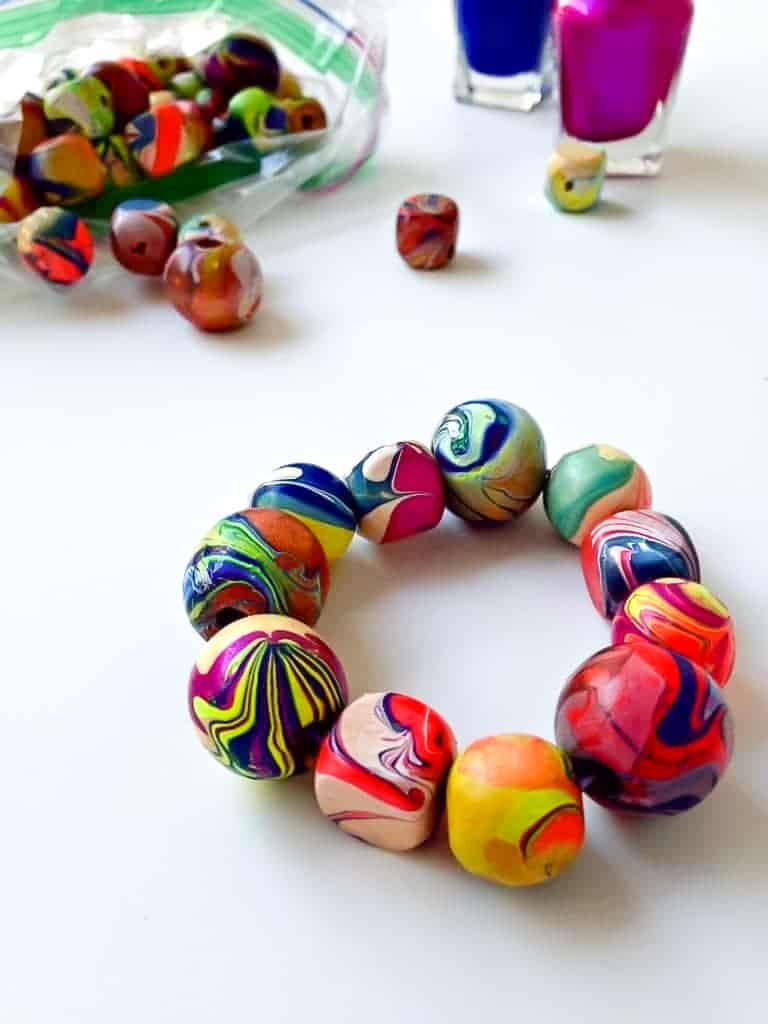
You can make your own marbled beads using supplies you have at home. Use nail polish to make a unique marbled effect on wooden beads to create a one-of-a-kind beaded bracelet.
 If you’re like me, you have a ton of nail polish, but there’s no way you will ever use it up just doing your nails! Well, you can have hours of fun making unique marbled beads. There’s a video below so I can teach you how.
What supplies do you need to create nail polish marbled beads?
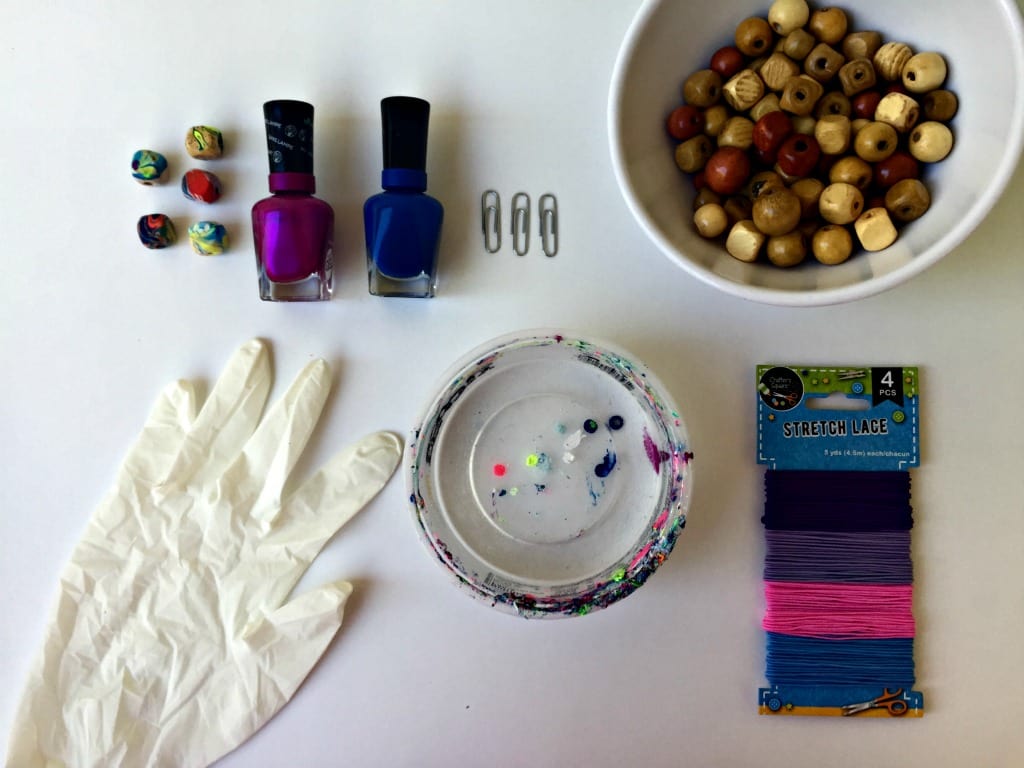
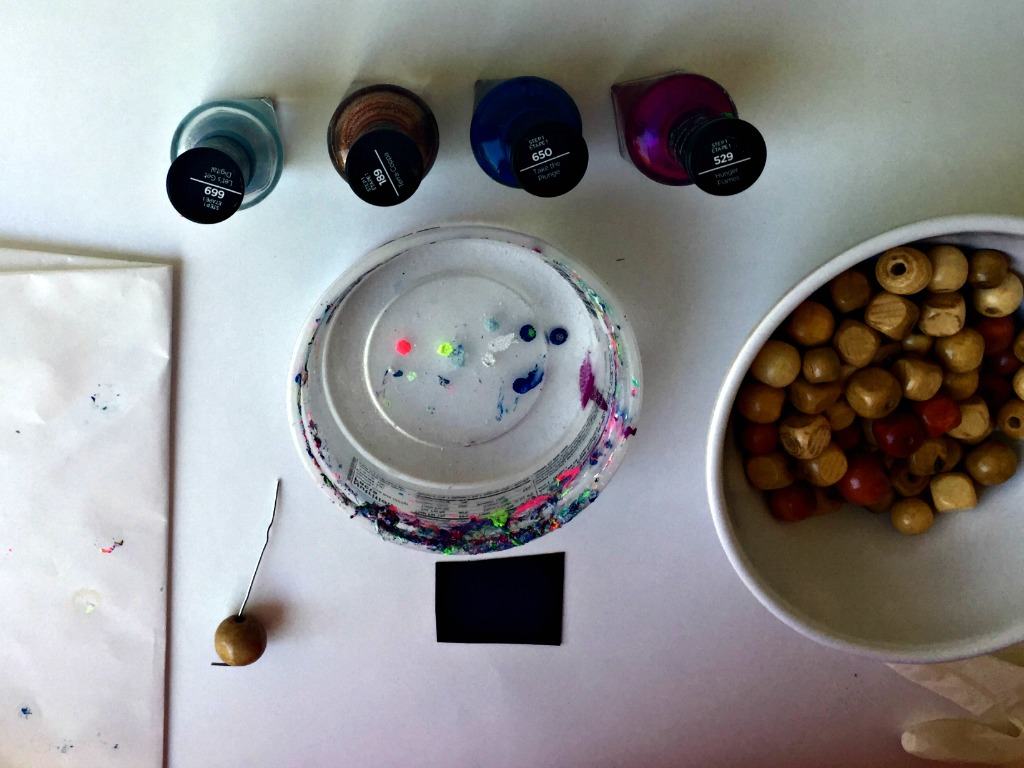
- Assorted colors of nail polish
- Wooden beads
- Paper clips
- A disposable plastic dish (I used an old yogurt container) filled with room temperature water
- Disposable gloves
- Elastic cord
- Wax paper (or freezer paper)
- Paper Towels
- A cover for your work surface (newspaper or a plastic tablecloth)
You probably have a lot of these supplies on hand already! If not, check your dollar store for many of the supplies. You might have to shop online or in a craft store for the wooden beads.
How to paint marbled beads with nail polish
For this project, the secret ingredient is nail polish, but it is used in a unique way. You aren’t just painting the beads like you would your fingernails (although, now that I think of it, that might be a cool craft!). No, to create the unique marbling effect, you need a bowl of room temperature water, and then you drip the nail polish onto the water, swirl it around, and dip a bead to create the beautiful design.
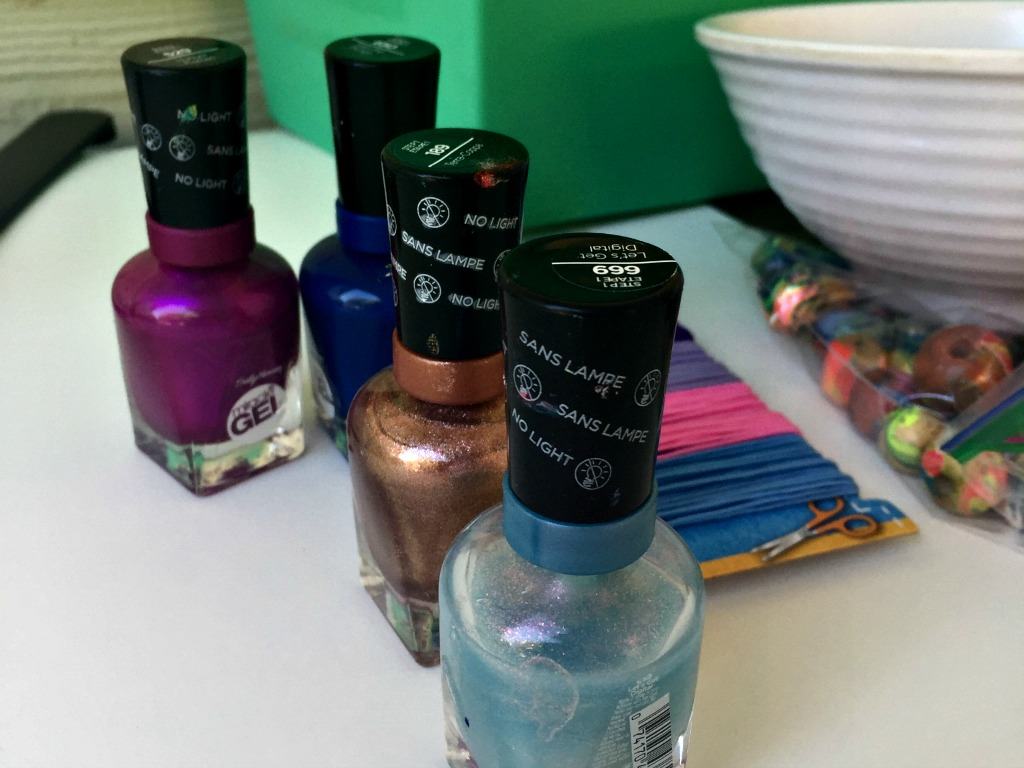
How to choose the best nail polish for this project
For best results, use nail polish that is less than a year old. Yes, you can try using your old polishes — just make a mental note of which ones work better for this project. Have a variety of colors and tones (light, dark, etc.) so that there is contrast within your marbled patterns. I recommend having white nail polish for this project as well. If you are low on nail polish, check the dollar store for tons of pretty colors.
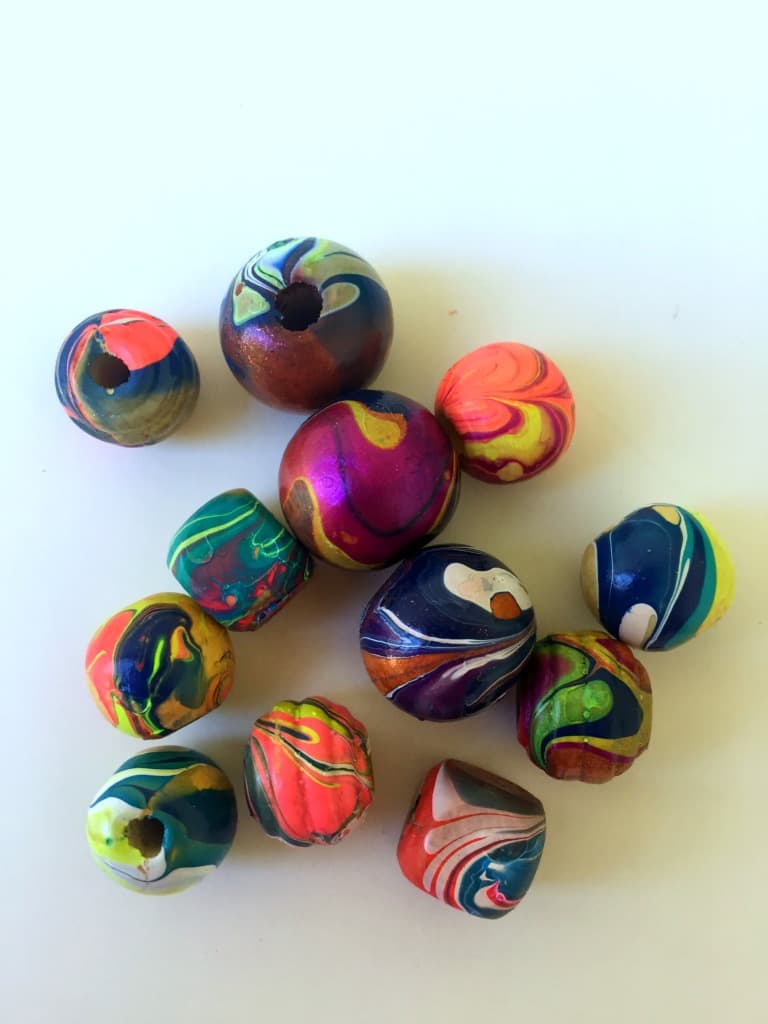
The thing I love most about this craft is that the results are unpredictable and you never know what your finished bead will look like until it’s done!
Nail polish marbled beads video tutorial
Aside from following all the steps I am explaining in this post, I recorded a video so it’s easier to learn what to do. Be prepared for your first few attempts to go wrong, and don’t be discouraged. It just takes a bit of practice to get the hang of this.
Trust me, I made many ugly beads before I figured out the proper techniques. Read on to find out all my tips and tricks to ace this craft.
How to Make Marbled Wooden Beads

Step 1: Create a Bead-Dipping and Marbling Tool.
Before you begin, you must get prepared. First, you will unbend two paperclips, leaving a small bend at the end of the clip. One of these will become your bead dipping tool. The other will be your marbling tool.
You will also need a “skimmer” — create one out of a small rectangular piece of plastic. I cut mine from a recycled yogurt lid. (See below the bowl of water in the following picture to see what I’m talking about).
Step 2: Get Your Work Surface & Supplies Set Up.
You will need to work fast to make these beads, so make sure your work surface is completely set up and ready to go. You need to:
- Protect your table with newspaper or a plastic tablecloth
- Set out a bowl with at least 1″ of room temperature water (make sure it is room temperature because if it’s too hot or too cold, it will cause the nail polish to dry too quickly to marble)
- Place a bowl of beads nearby
- Put down a sheet of wax paper or freezer paper to place your finished beads for drying
- Place a couple paper towels near your work space because this is messy
- Put your skimmer, marbling tool, and the bead dipping tool threaded with a bead
- Open all nail polish bottles and keep them close to the bowl
- Put on disposable gloves (if you want to keep your hands and nails nice! Like I said, this is messy. It is so worth it to get some dollar store latex gloves to save your hands!)
- Make sure the room is ventilated because the nail polish fumes get strong after a few minutes!
Step 3: Water Marbling With Nail Polish!
Now you’re ready to start! Try to work as quickly as you can.
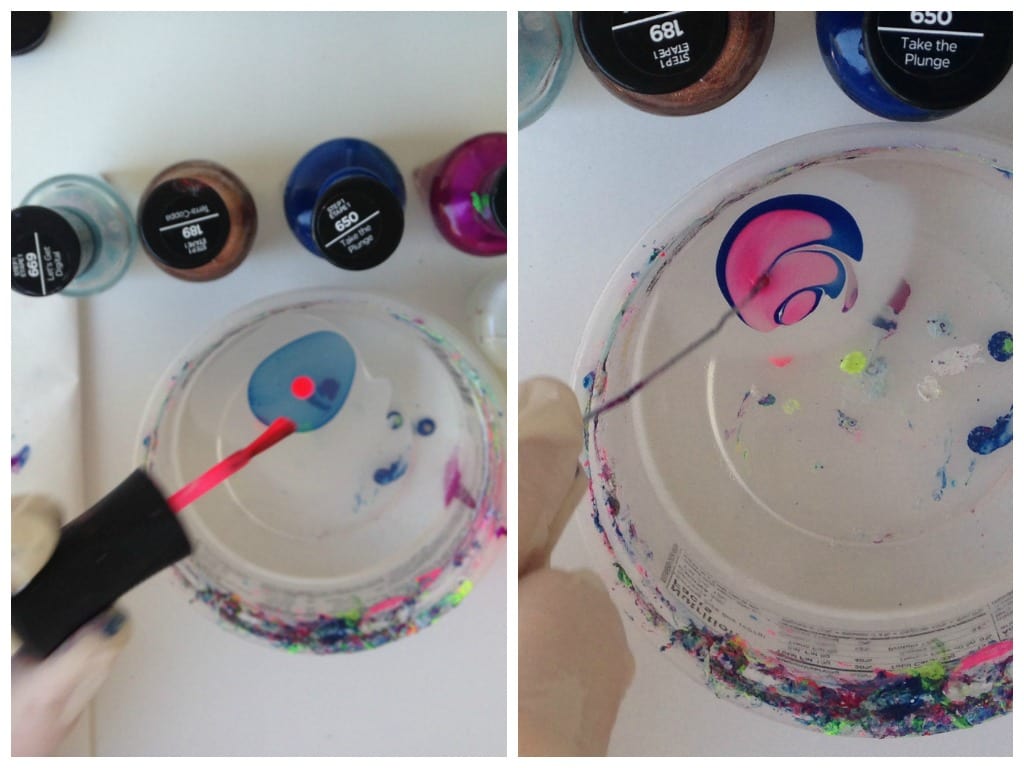
- To begin, drip one drop of nail polish on the water surface (in the left photo above, the first color I used was white, and you can vaguely see it around the blue circle of nail polish on the water surface). You will probably see it spread out quickly on the water.
- Quickly drip two more drops of polish over the first one.
- Use your marbling tool (aka, the straightened paperclip) to marble the colors together. For best results, begin marbling toward the outside of the middle drop (the blue) of the polish.
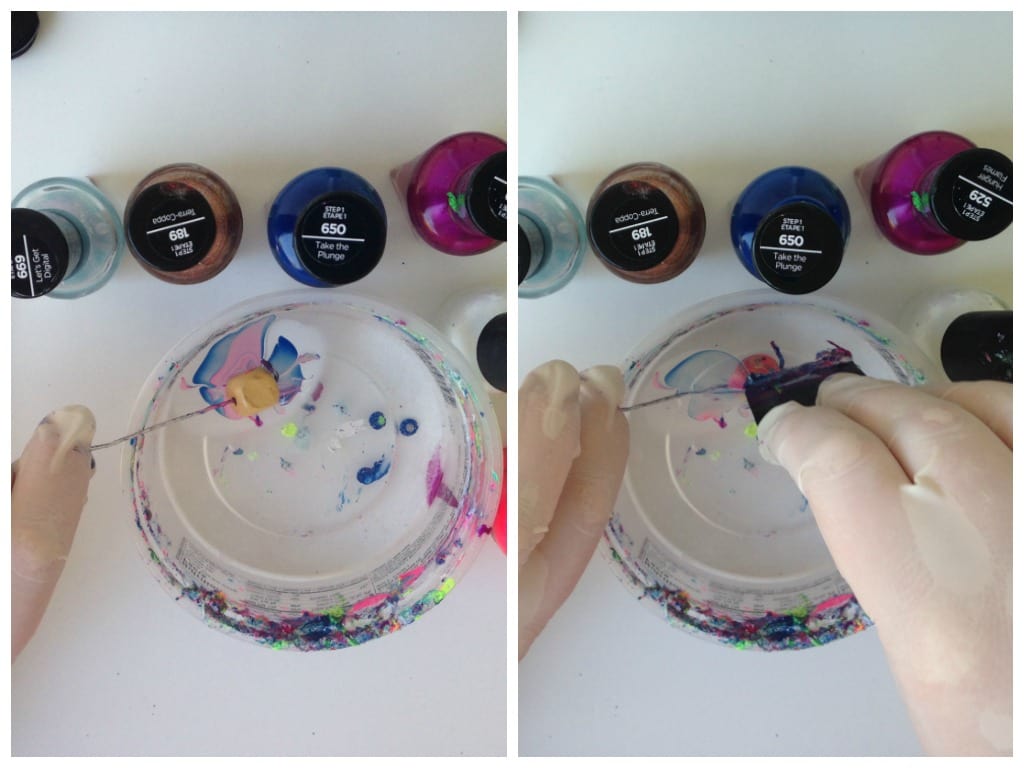
Step 4: Dipping the Bead.
Grab your bead dipping tool that is already threaded with a bead (right?! You did that part before you started, right?), and slowly dip it into the marbled polish on the surface of the water. Move it around the marbled area, and submerge the bead completely under the water. DON’T LIFT IT OUT OF THE WATER until you skim the excess nail polish off the top of the water with your skimmer.
You need to remove the excess to make a smooth bead with a clear marbled pattern.
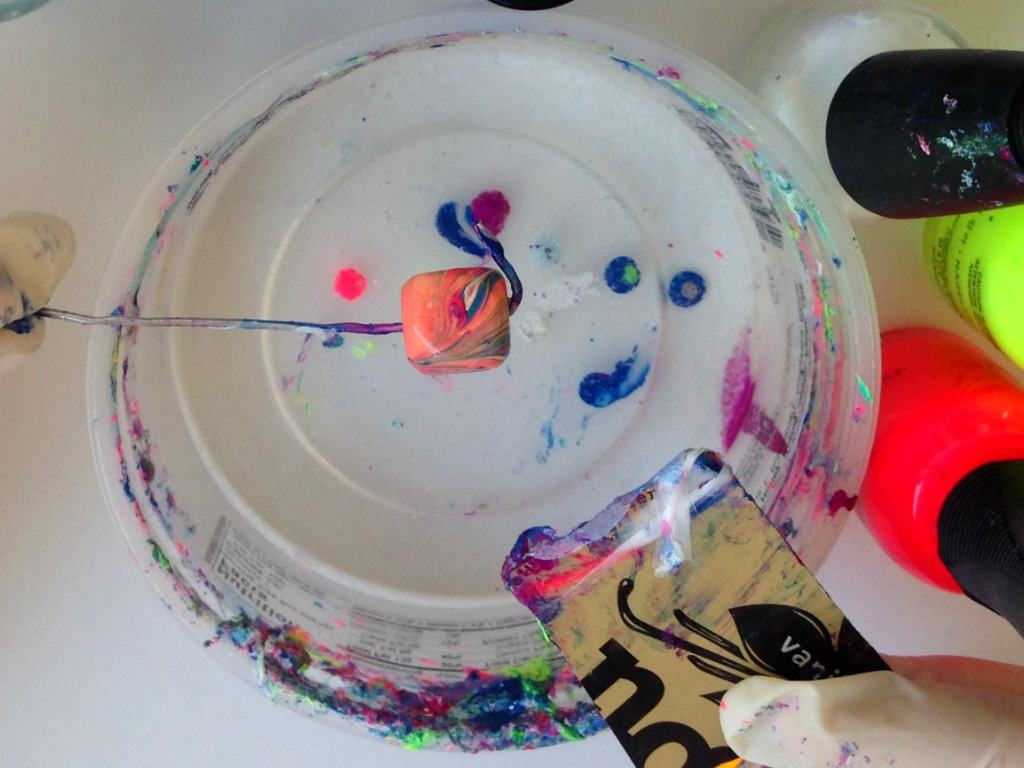
Once you have skimmed the water, remove the bead from the water and set it aside on your wax paper to dry. Then thread your bead dipping tool and start the process again.
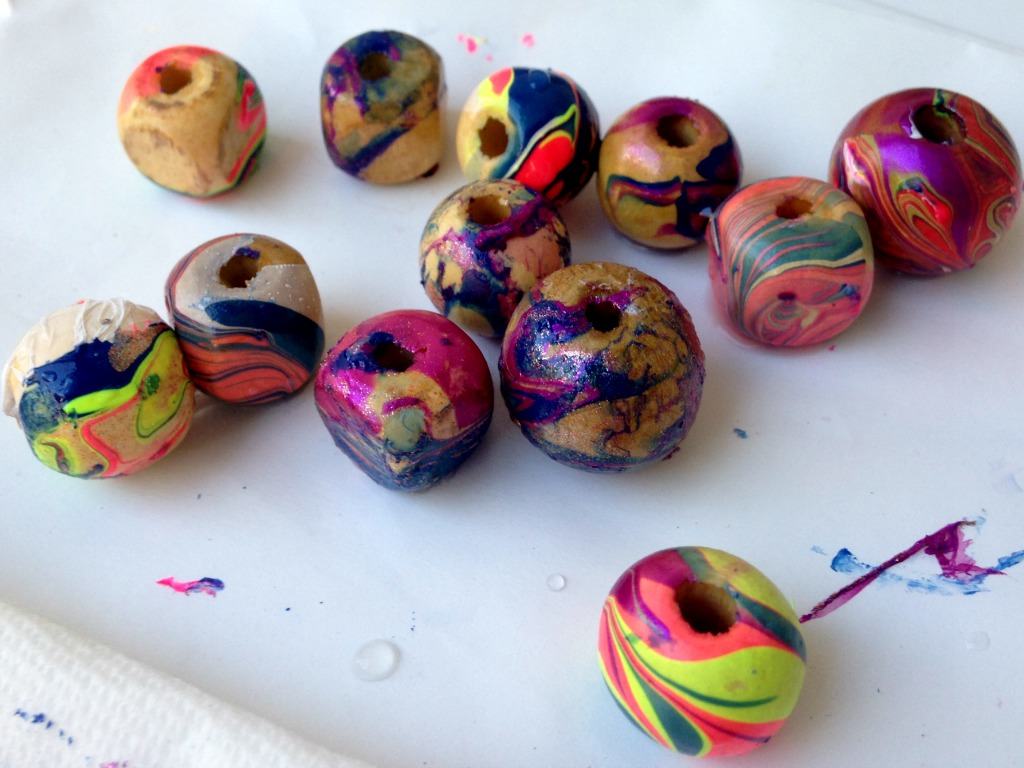
This process is mesmerizing and makes you want to sit there for a long time making beads!
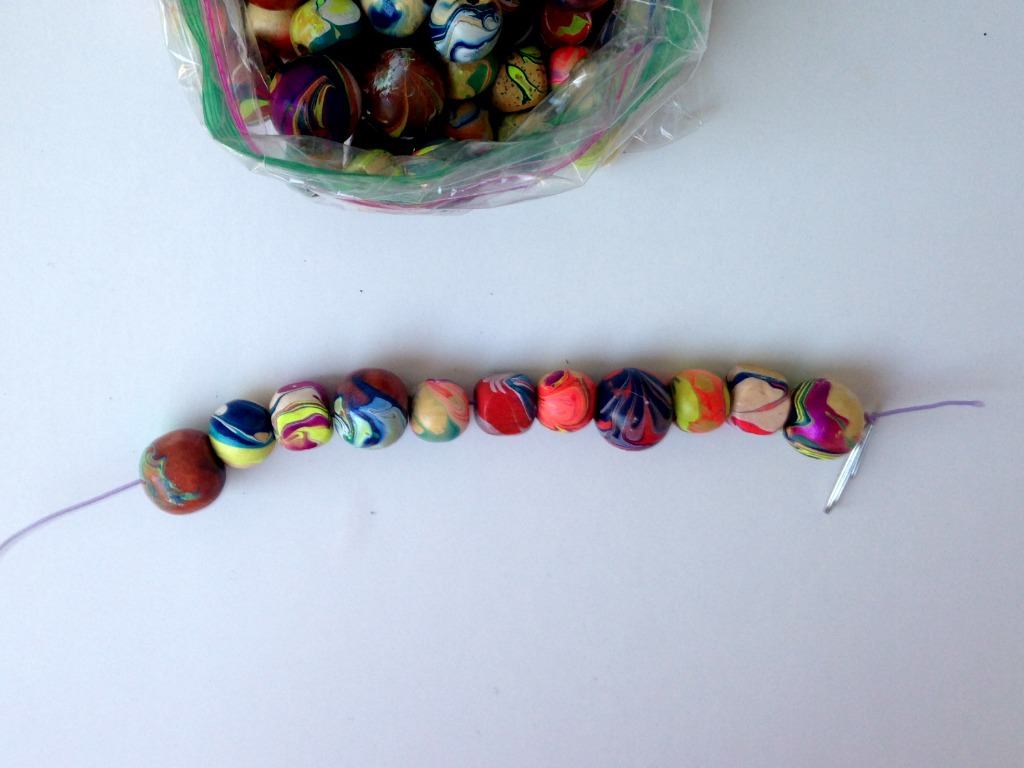
You can see some of the bead fails in the center of this picture, from the left. It took me a few tries to get the process down smoothly. Hey, just keepin’ it real!
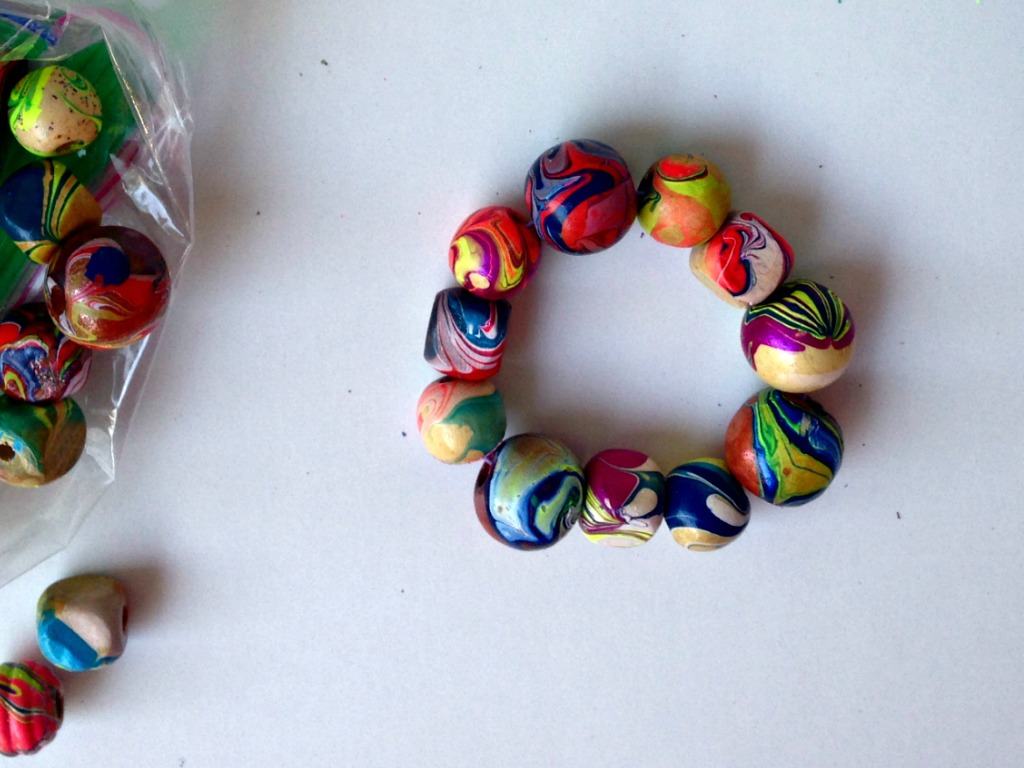
When you finish making beads, create a bracelet out of all your new pretties.
Make sure the beads are completely dry. I turned mine over after 15 minutes or so to make sure both sides were dry.
How To Make a Marbled Bead Bracelet
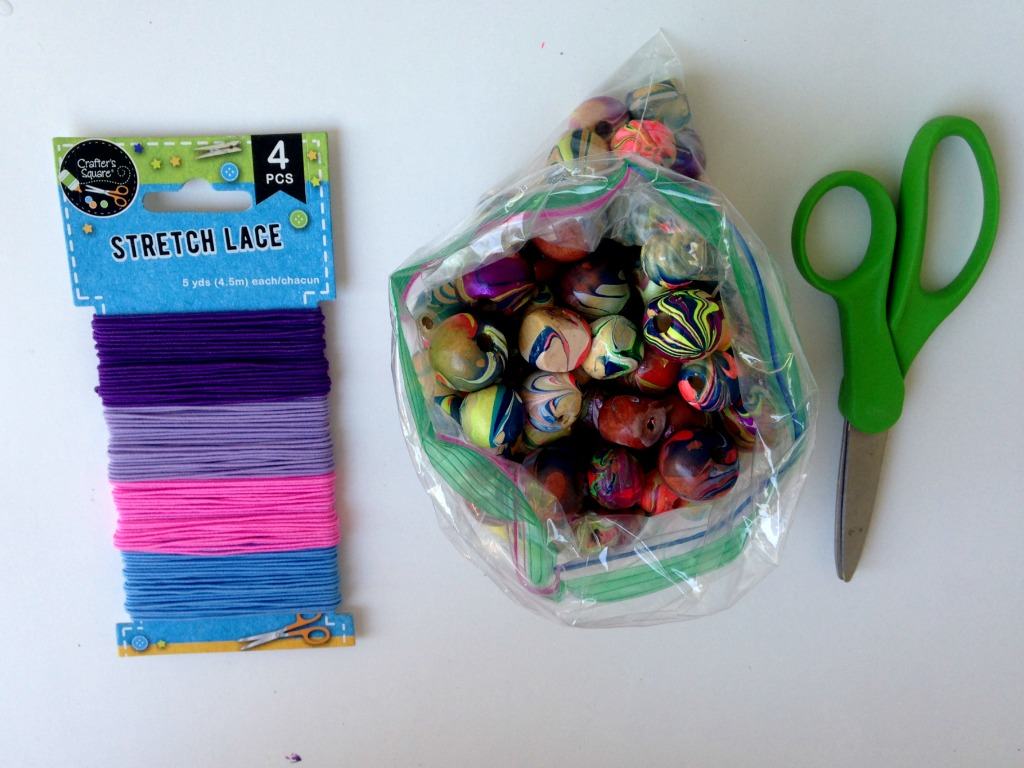
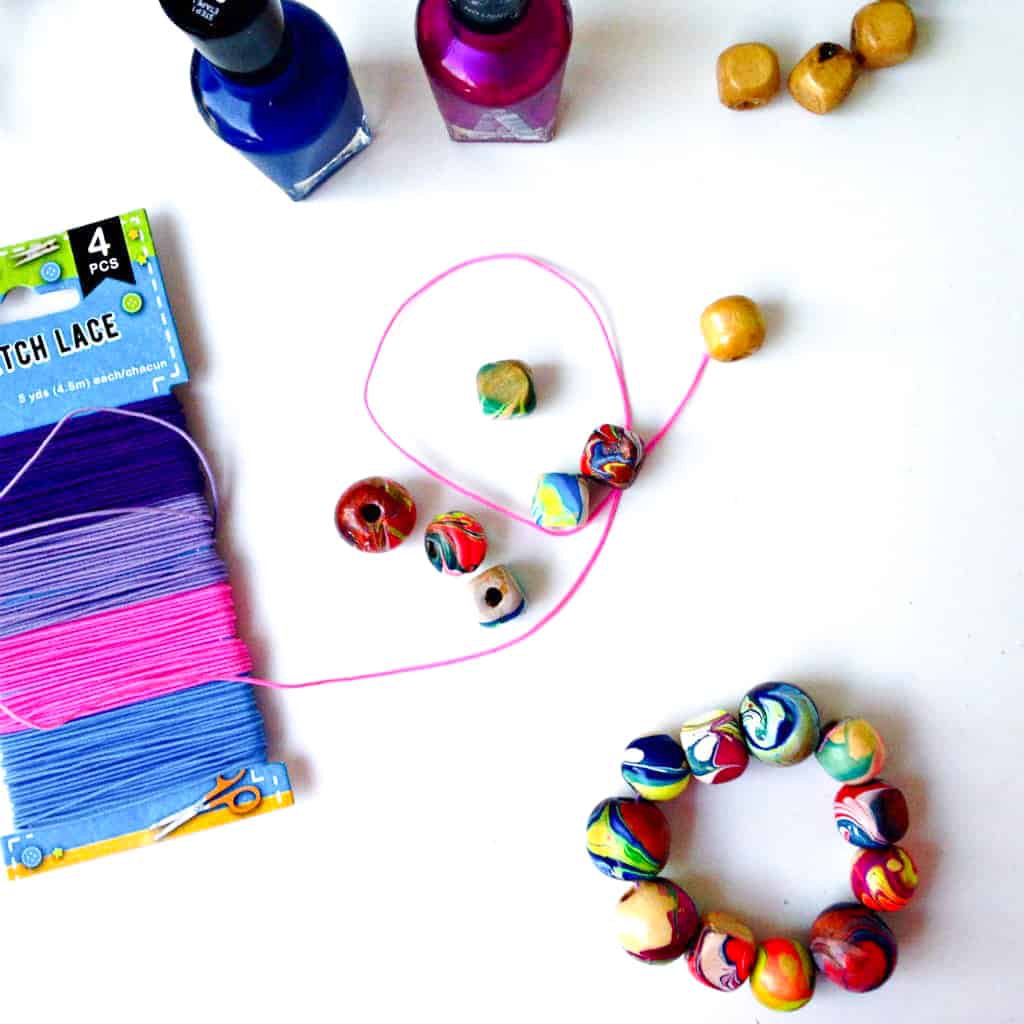
Supplies:
- elastic cord (I got mine at the dollar store)
- your marbled beads
- scissors,
- a paperclip
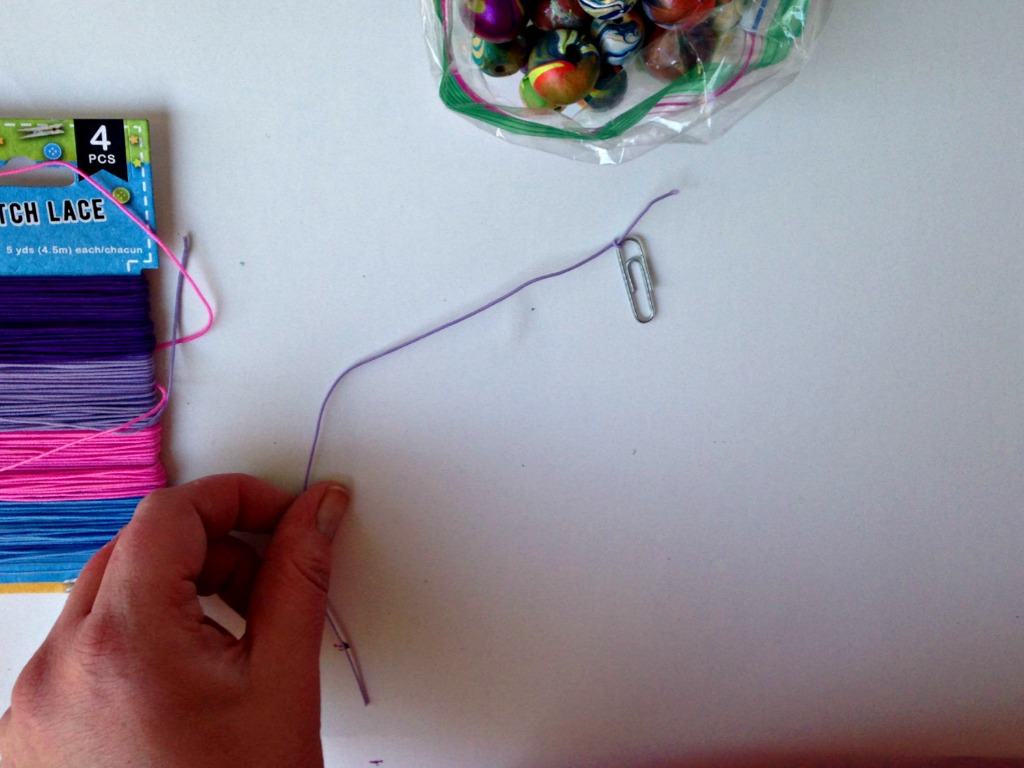
Step 1: Prepare the Cord.
Cut a piece of elastic cord about 10″ long. It doesn’t have to be exact, but just make sure it is a few inches longer than your wrist. Tie a paper clip to one end of the cord to act as a stopper for the beads as you string them.
Step 2: String the Marbled Beads.
Put your favorite beads on the cord until there are enough beads to go around your wrist.
Step 3: Tie and Clip.
Slip the paperclip off the end of the bracelet, and tie the two ends of the elastic cord together using a square knot. Stretch the bracelet very slightly when you tie it to keep the beads snug together. Clip the tails of the elastic cord near the knot.
What if the water marbling with nail polish isn’t working?
If you are having trouble water marbling with nail polish, make sure:
- Your water is room temperature. If room temp water isn’t working, warm it up slightly or cool it down to experiment with how the nail polish reacts to the surface. You might also need to try filtered water or distilled water if you really can’t make it work with your city’s tap water.
- There isn’t too much air movement in the room. (For example, I made these outside, and the wind made the nail polish dry quicker than I thought it would.)
- You try different polishes. Different brands of nail polish might work better than others. I found that my more expensive polishes were best just because they have large brushes that hold more polish, so it was quicker to drip polish on the water surface.
I hope you enjoy this beautiful bracelet tutorial.
More crafts and DIY ideas
- Craft for Dr. Seuss fans: Lorax paper bag puppet
- Craft For The Day Of The Dead: Paper Plate Skull
- Easter Homemade Edible Playdough DIY
- Dollar Store Hugs and Kisses Book Stack DIY