DIY: Back To School Goody Bags
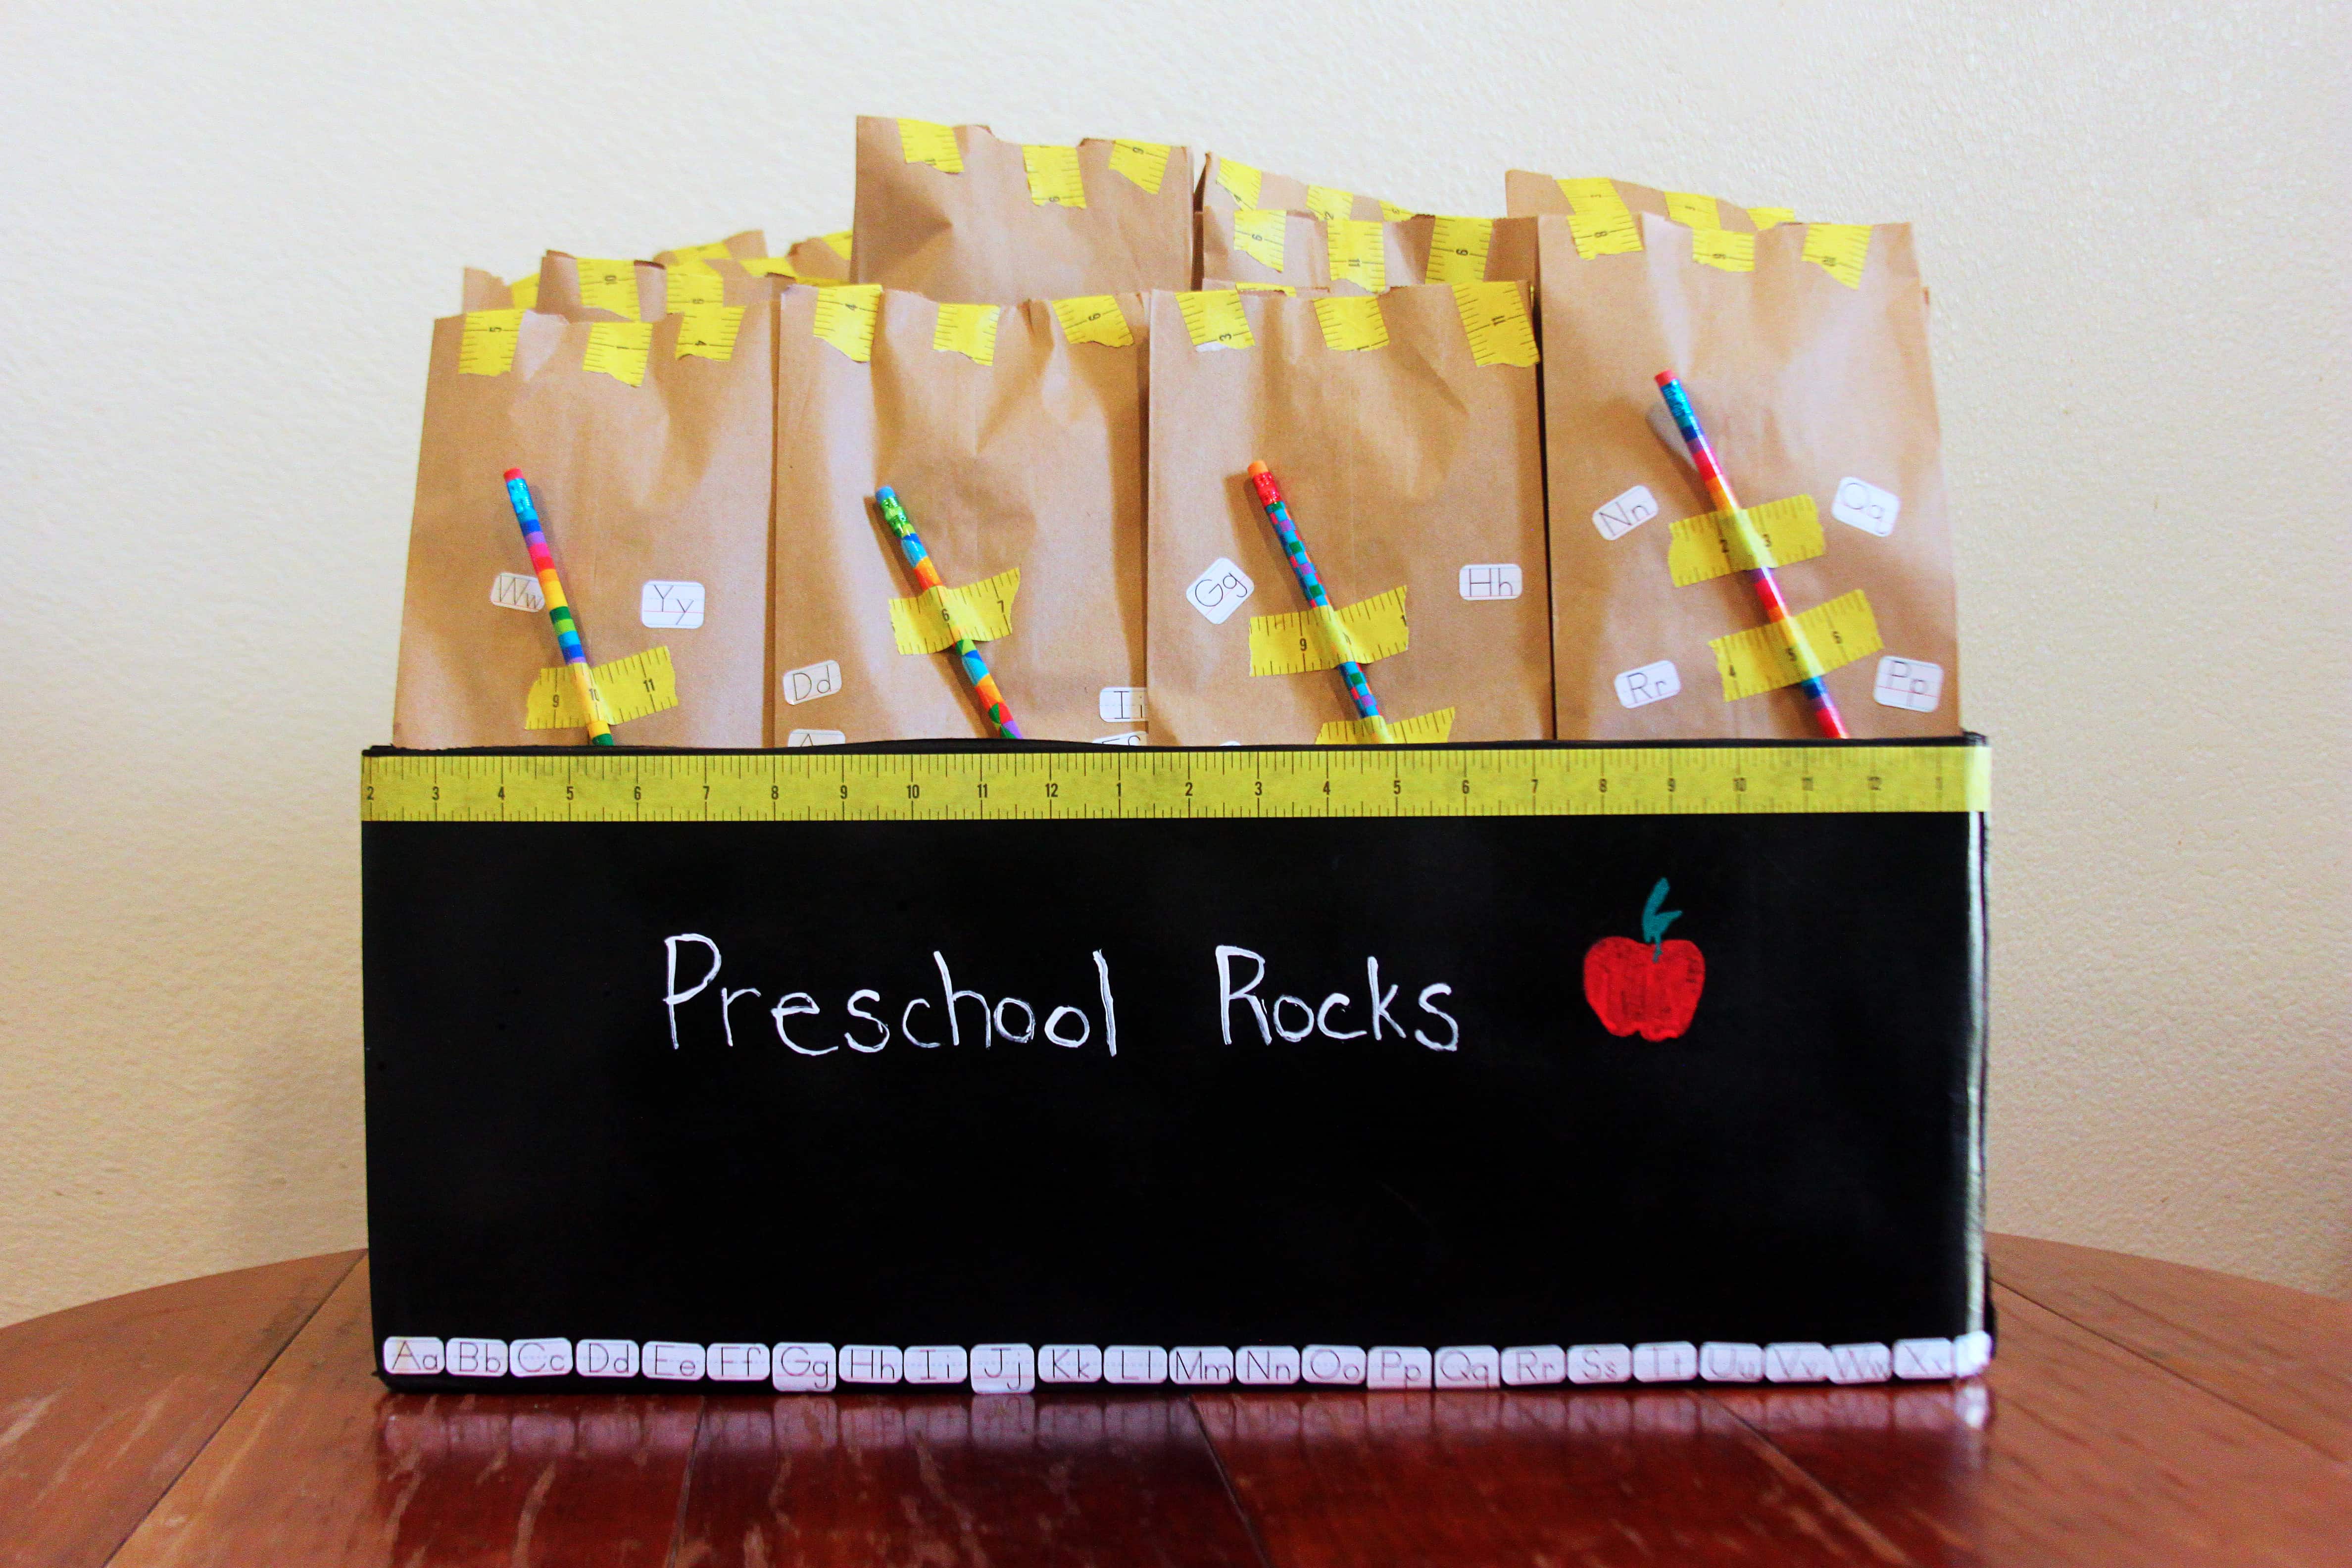
Check out these adorable back-to-school goody bags I made on the cheap. It all came about because I had volunteered to put together the goody bags for my daughter’s annual preschool picnic. I ordered everything online including gift bags, but in a total rookie maneuver, I did not check the dimensions of the bags I ordered. When I got them, they were so tiny that nothing fit inside of them.
I had to make an emergency run to buy gift bags at the last minute and was shocked at how expensive they are. Olvídate, I’m not going to pay more for gift bags than I paid for the goodies I’m putting in them, so I decided to make my own. They came out cuter and more original than any of the overpriced options. I’m totally going to use this technique again and thought I would share the how-to with you!
Back To School DIY Goody Bags
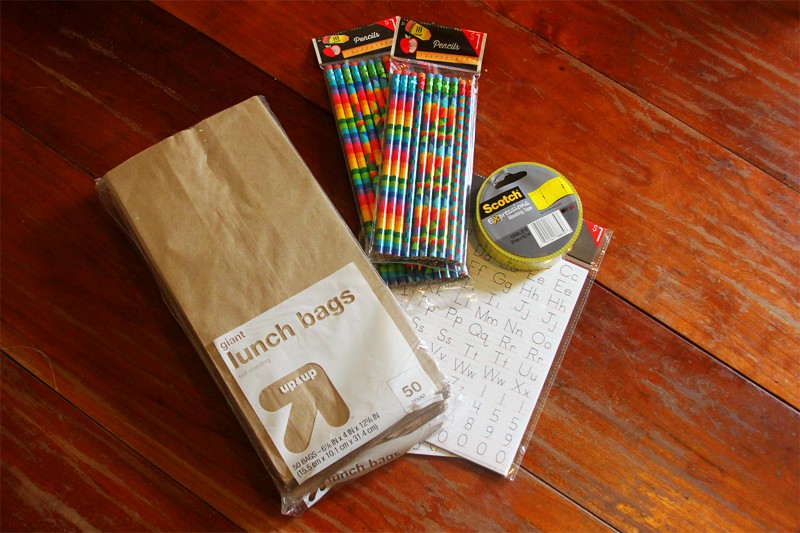
Supplies:
- Brown Paper Lunch Bags
- Pencils (I got them from the dollar aisle at Target)
- Alphabet Stickers (Again, from dollar aisle at Target)
- Scotch Washi Masking Tape “Ruler” ( I got it at Target for about $3)
Directions:
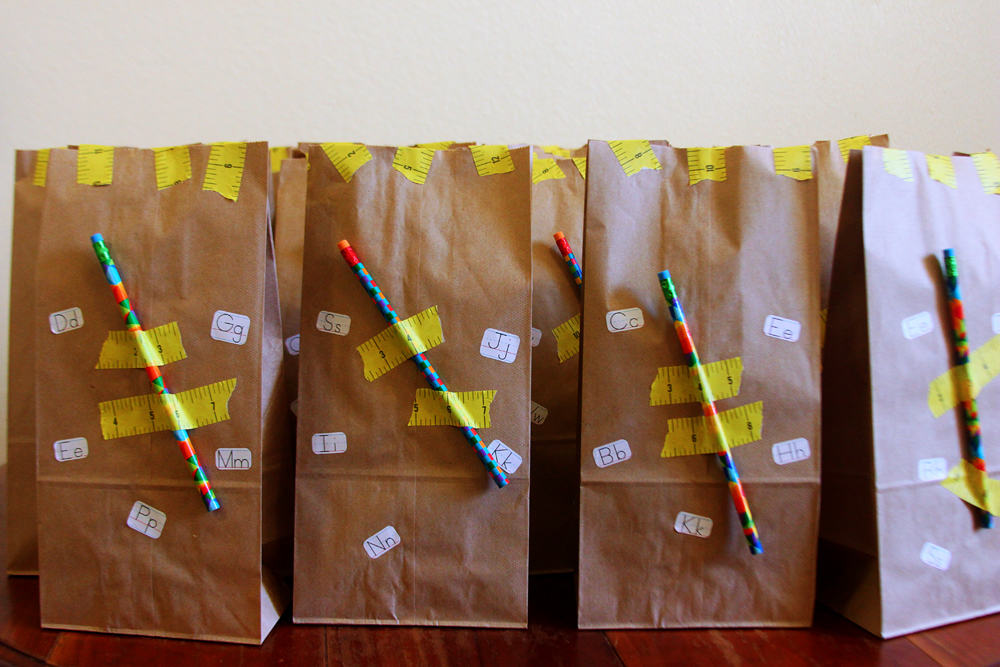
- Decorate the front and back of each bag with the alphabet stickers. I randomly placed five on each side.
- Use two strips of the “Ruler” washi tape to attach a pencil to the center of each bag at a rakish angle.
- Fill the bags with whatever goodies you’ve got to give.
- Tape the top of the bags with three strips of the “Ruler” washi tape.
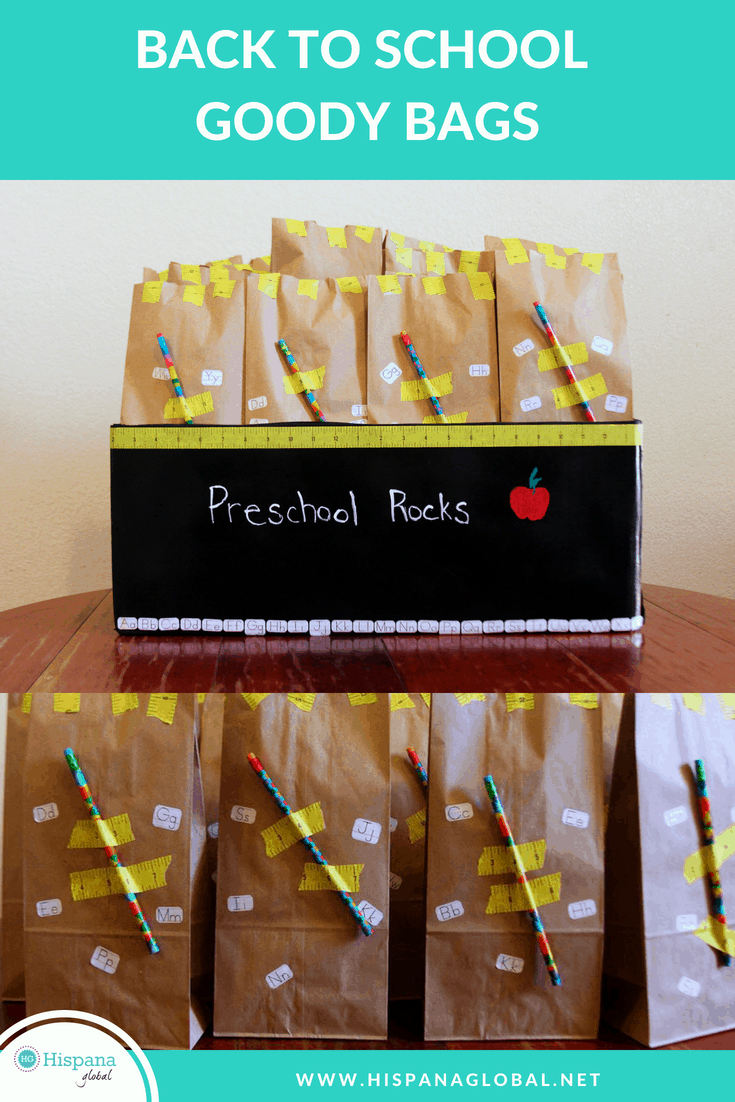
That’s it! If you want to get super fancy like I did and create a presentation box for your goody bag, you can take a cardboard box and spray paint it black (in a well-ventilated area of course) and when it’s dry, use the same tape and stickers to decorate it. I also used colored chalk pens to write on the box to give it a school blackboard feel.
Images via Claudya Martinez