DIY: how to make personalized cell phone cases
If you think personalized cell phone cases are expensive, think again.
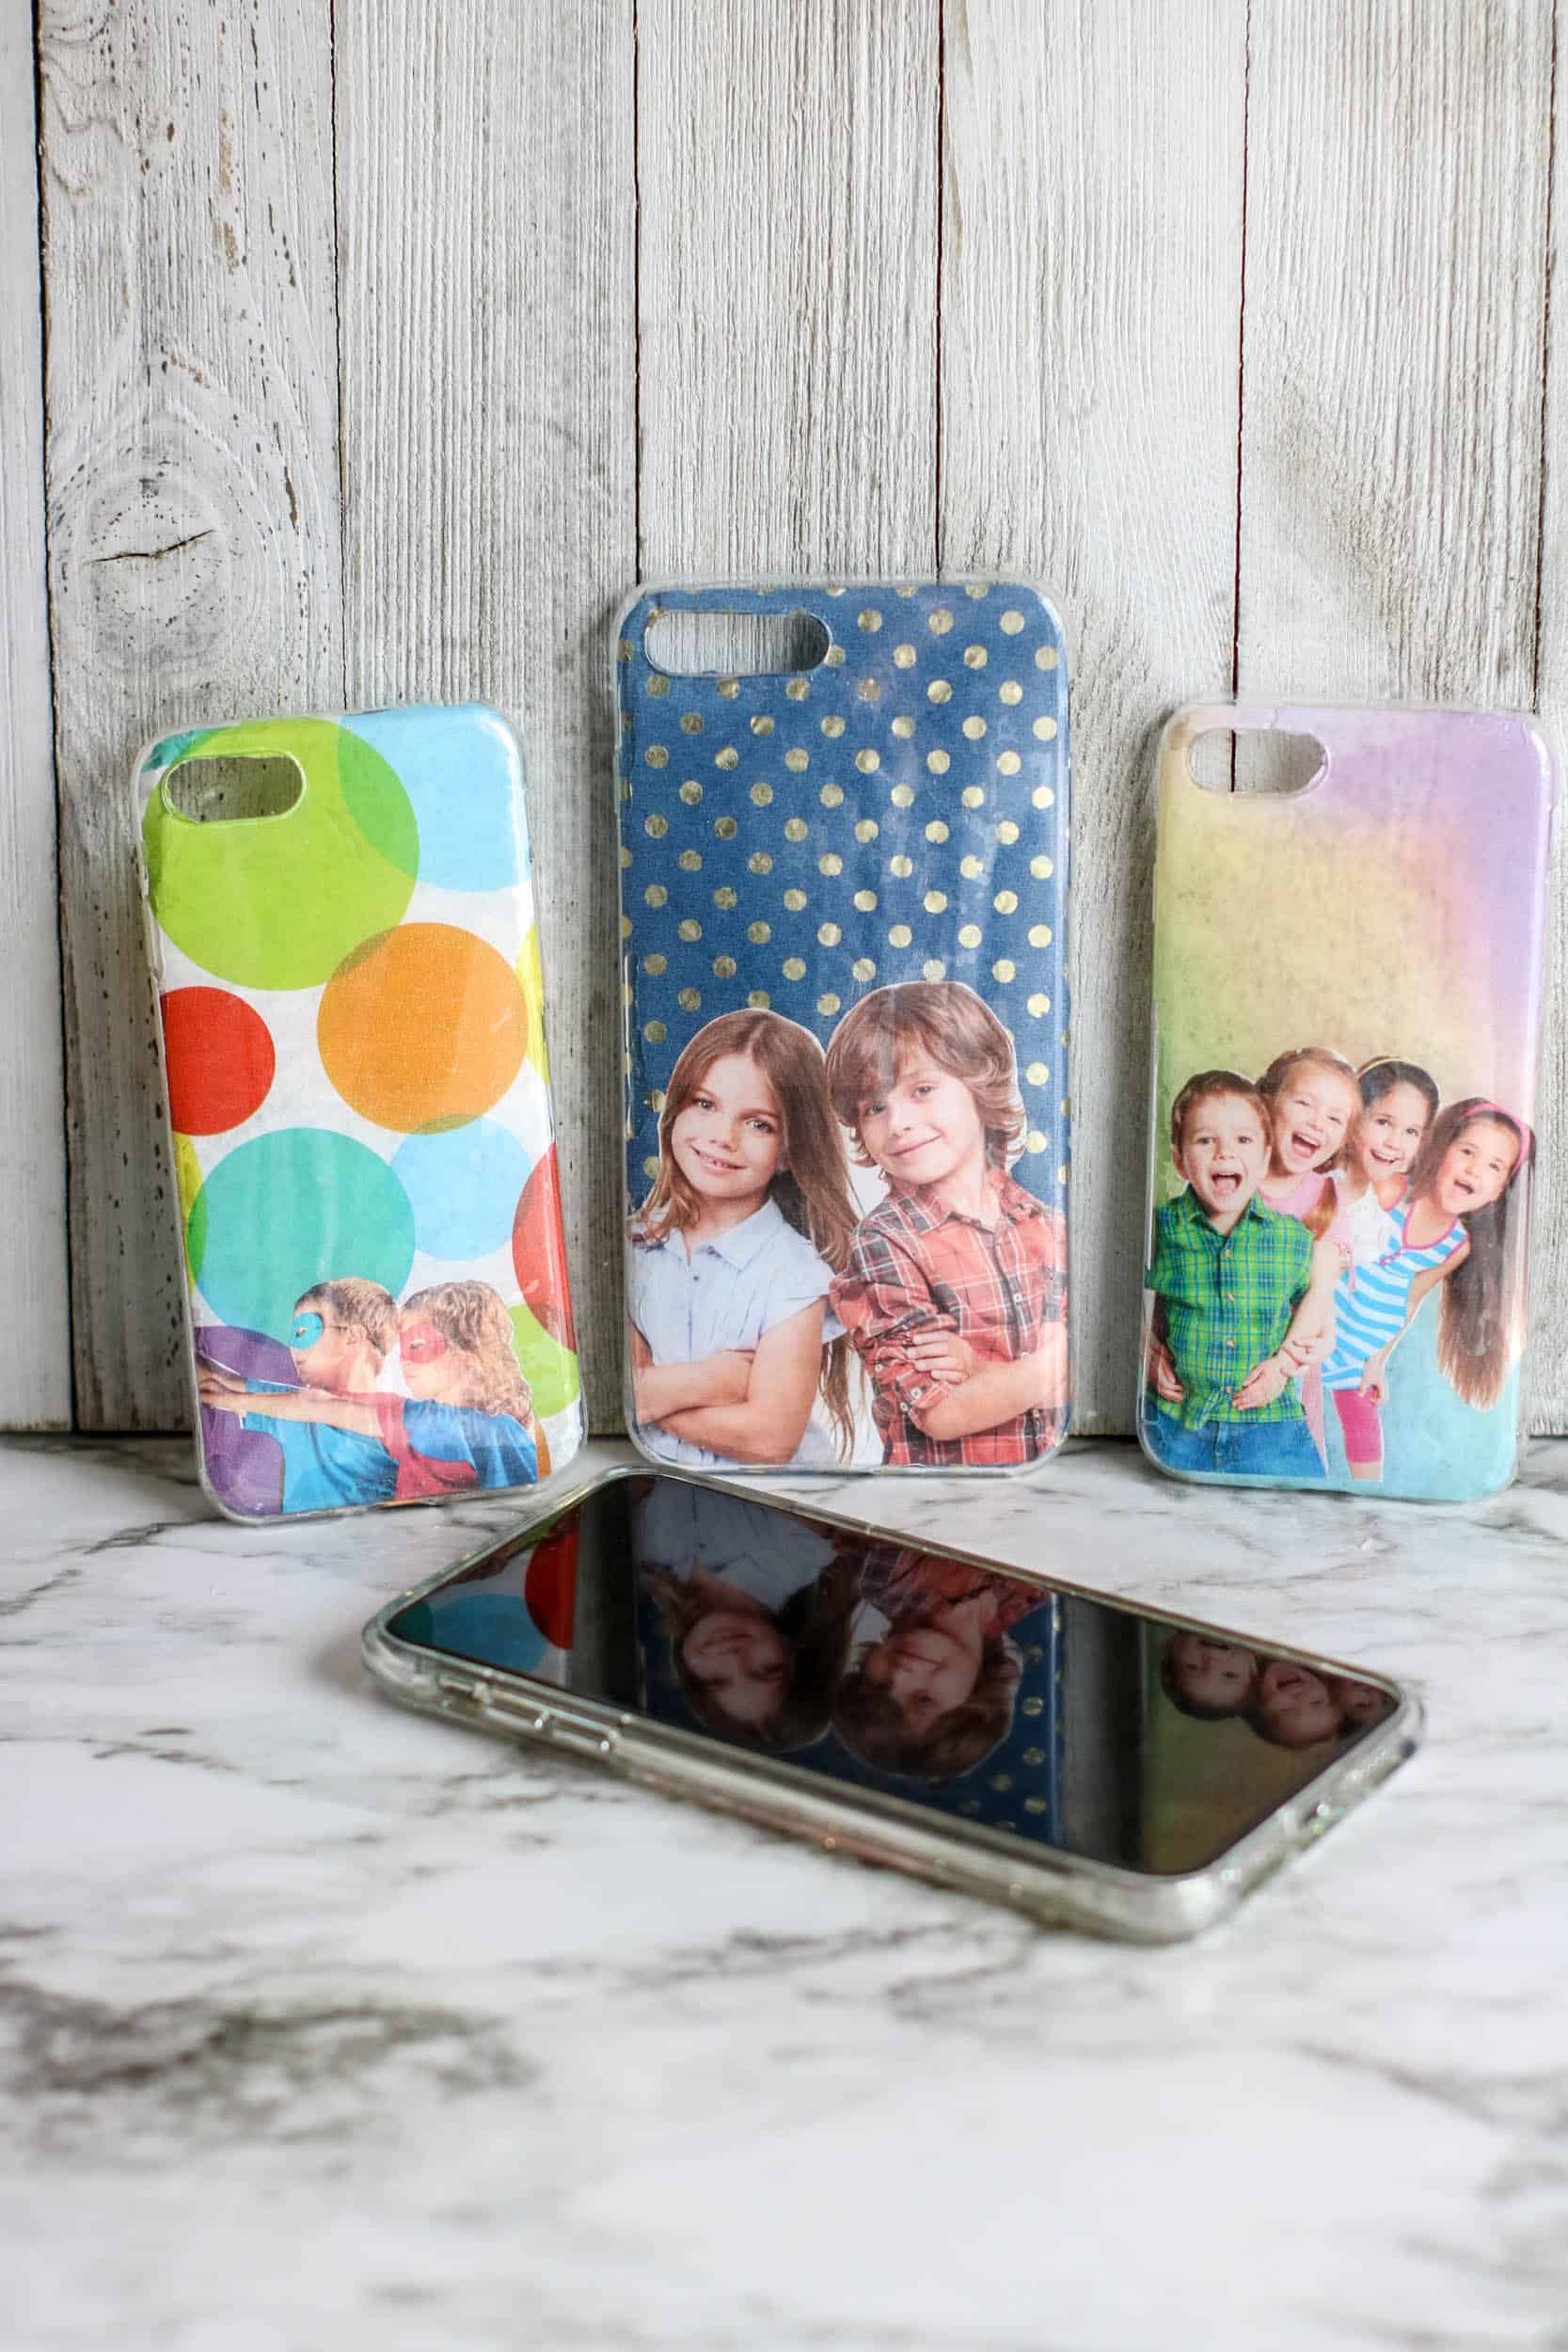
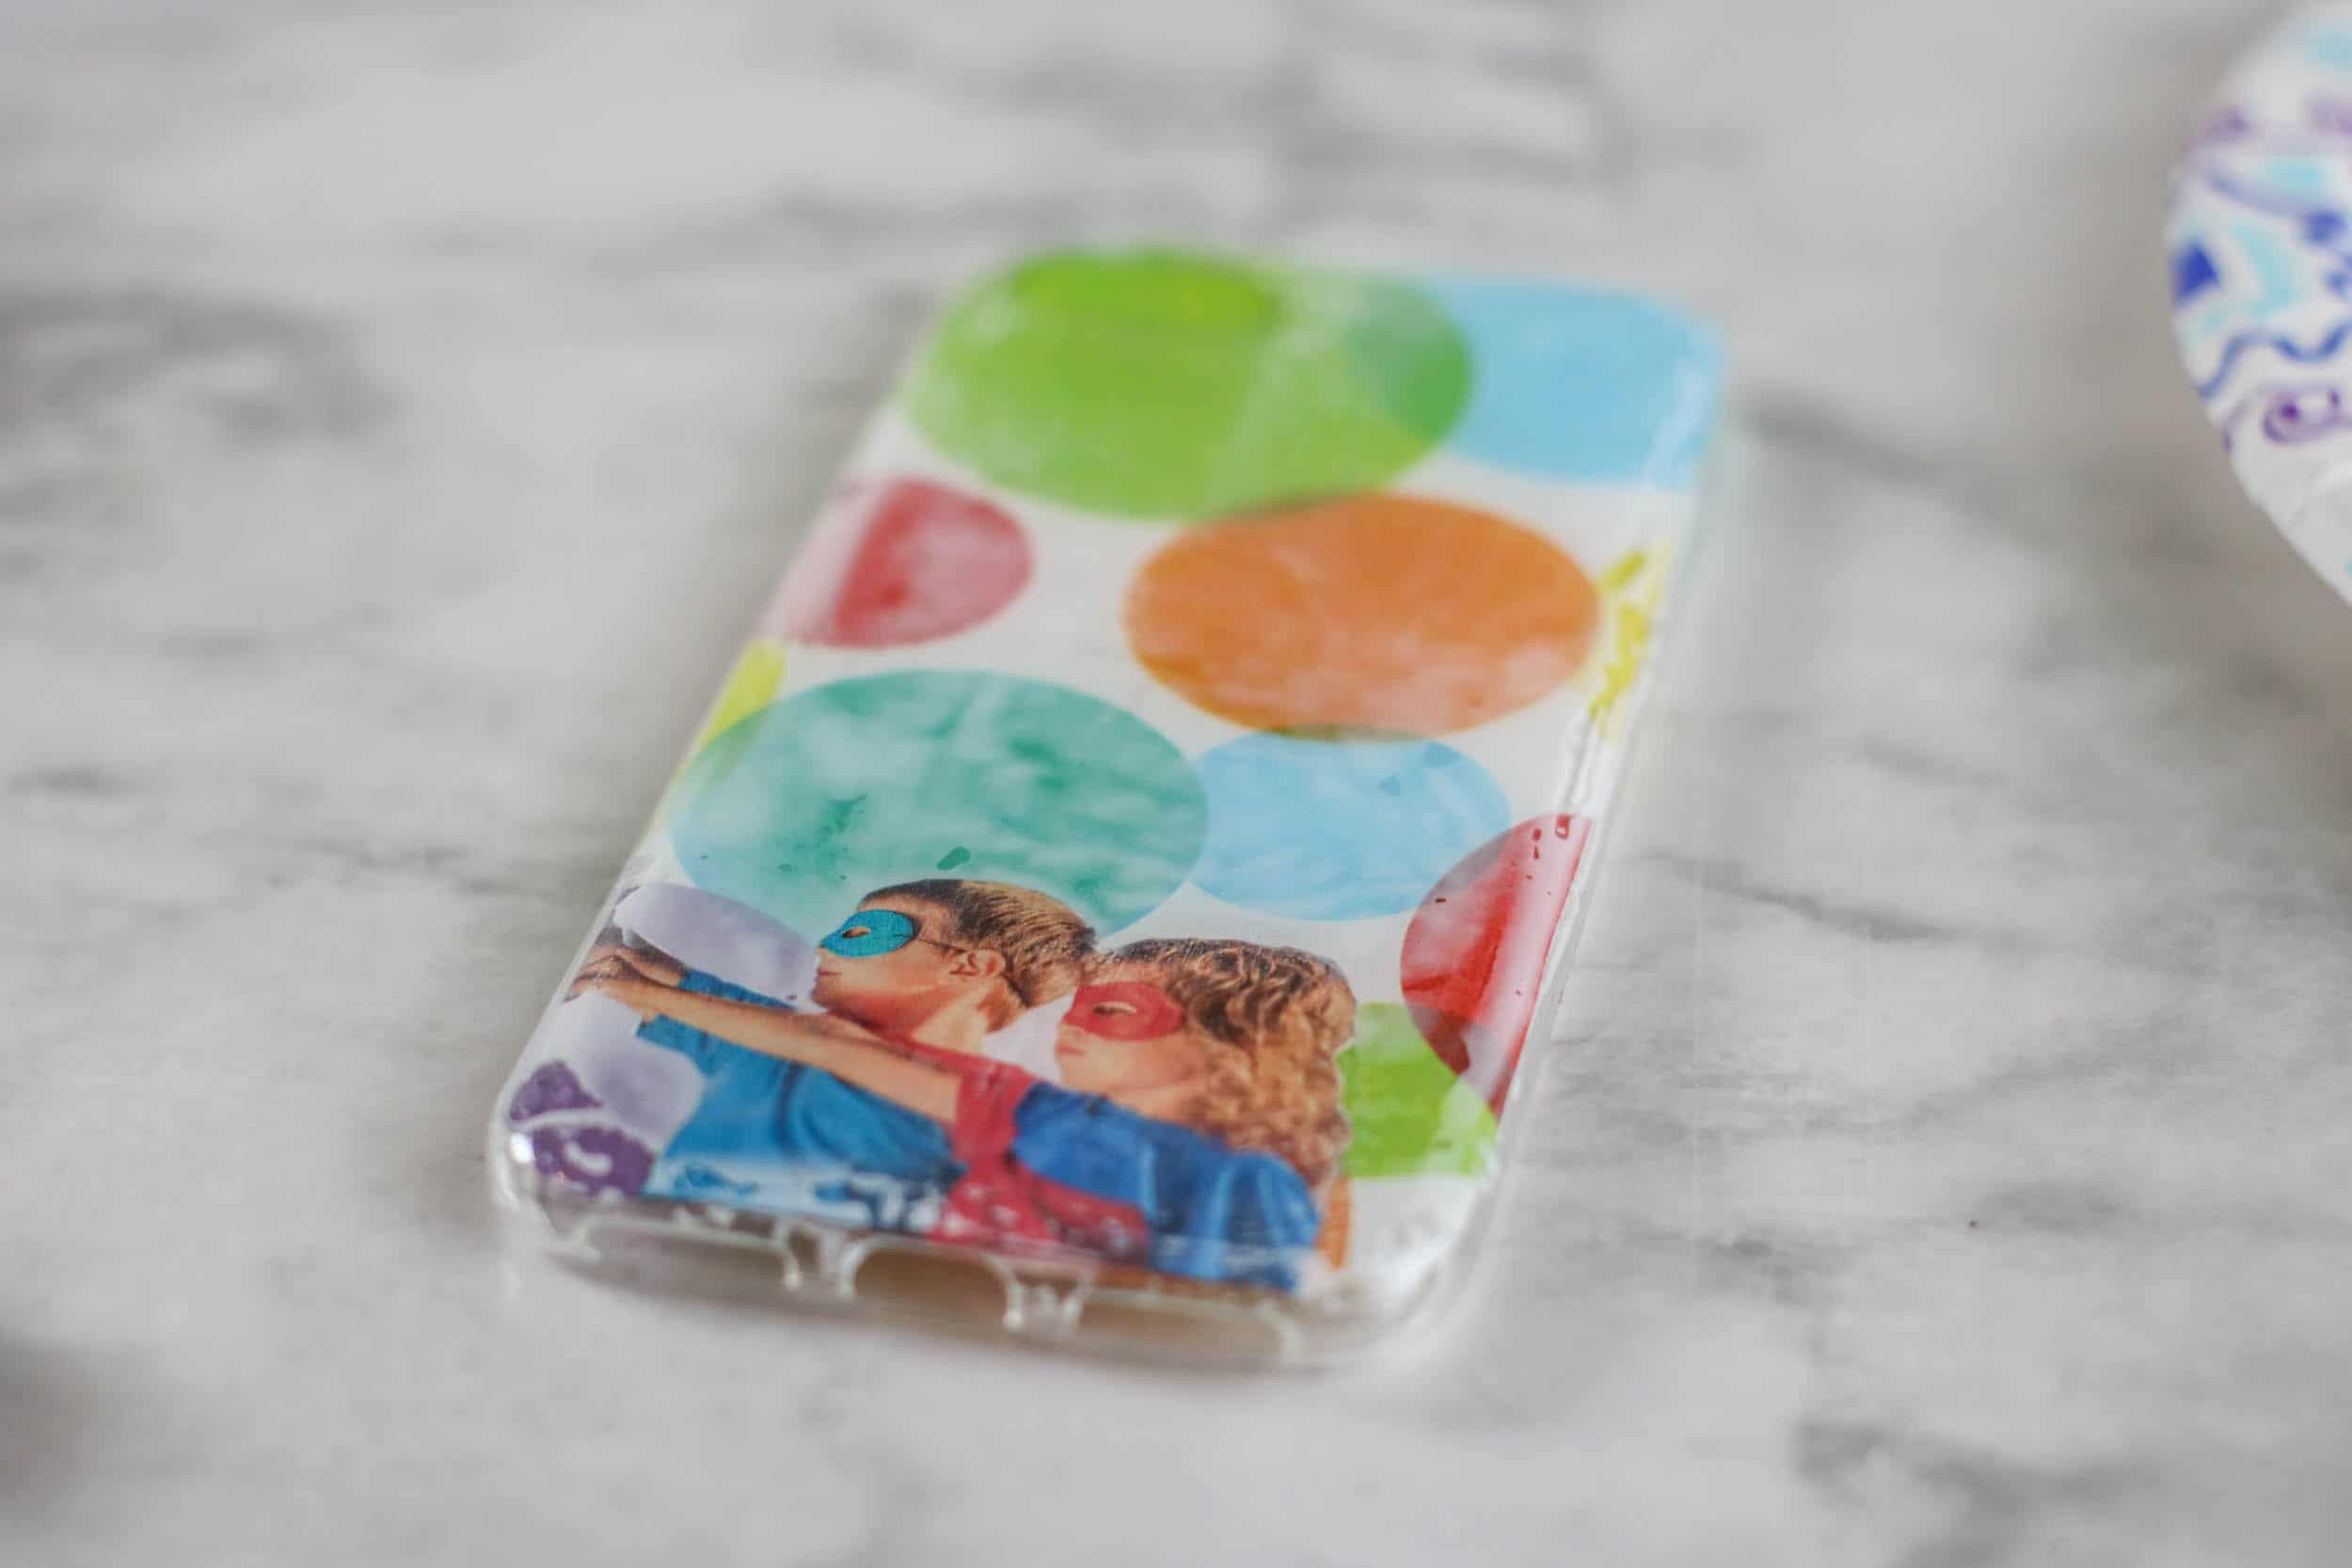
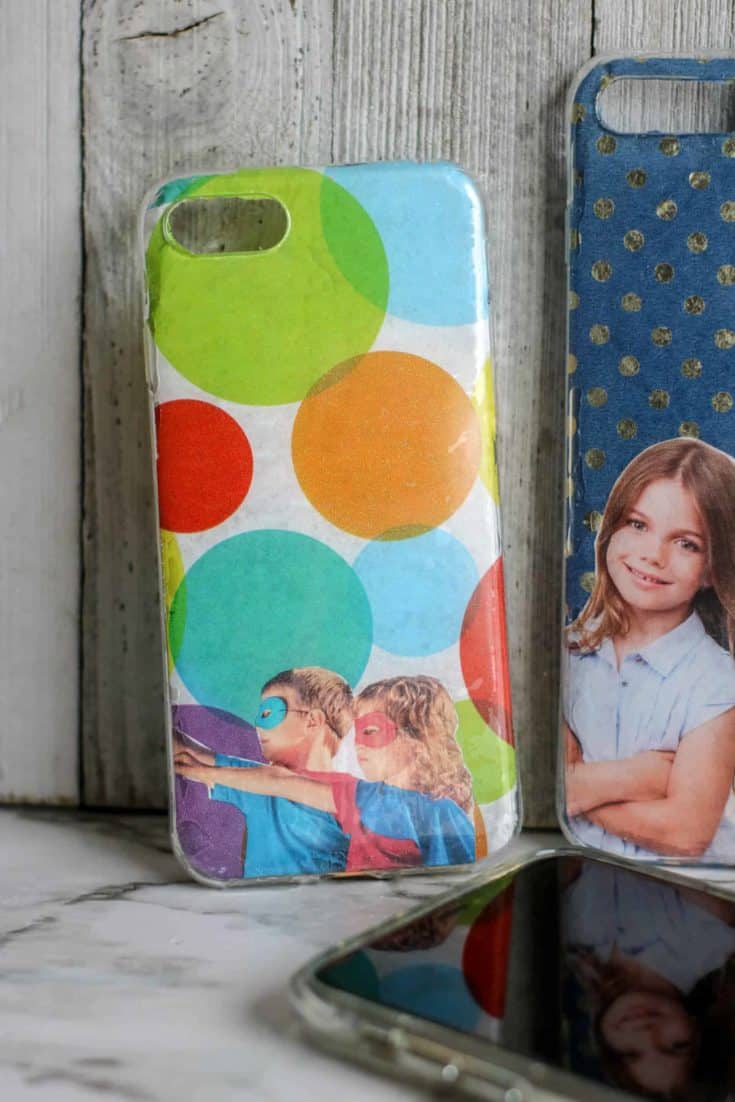
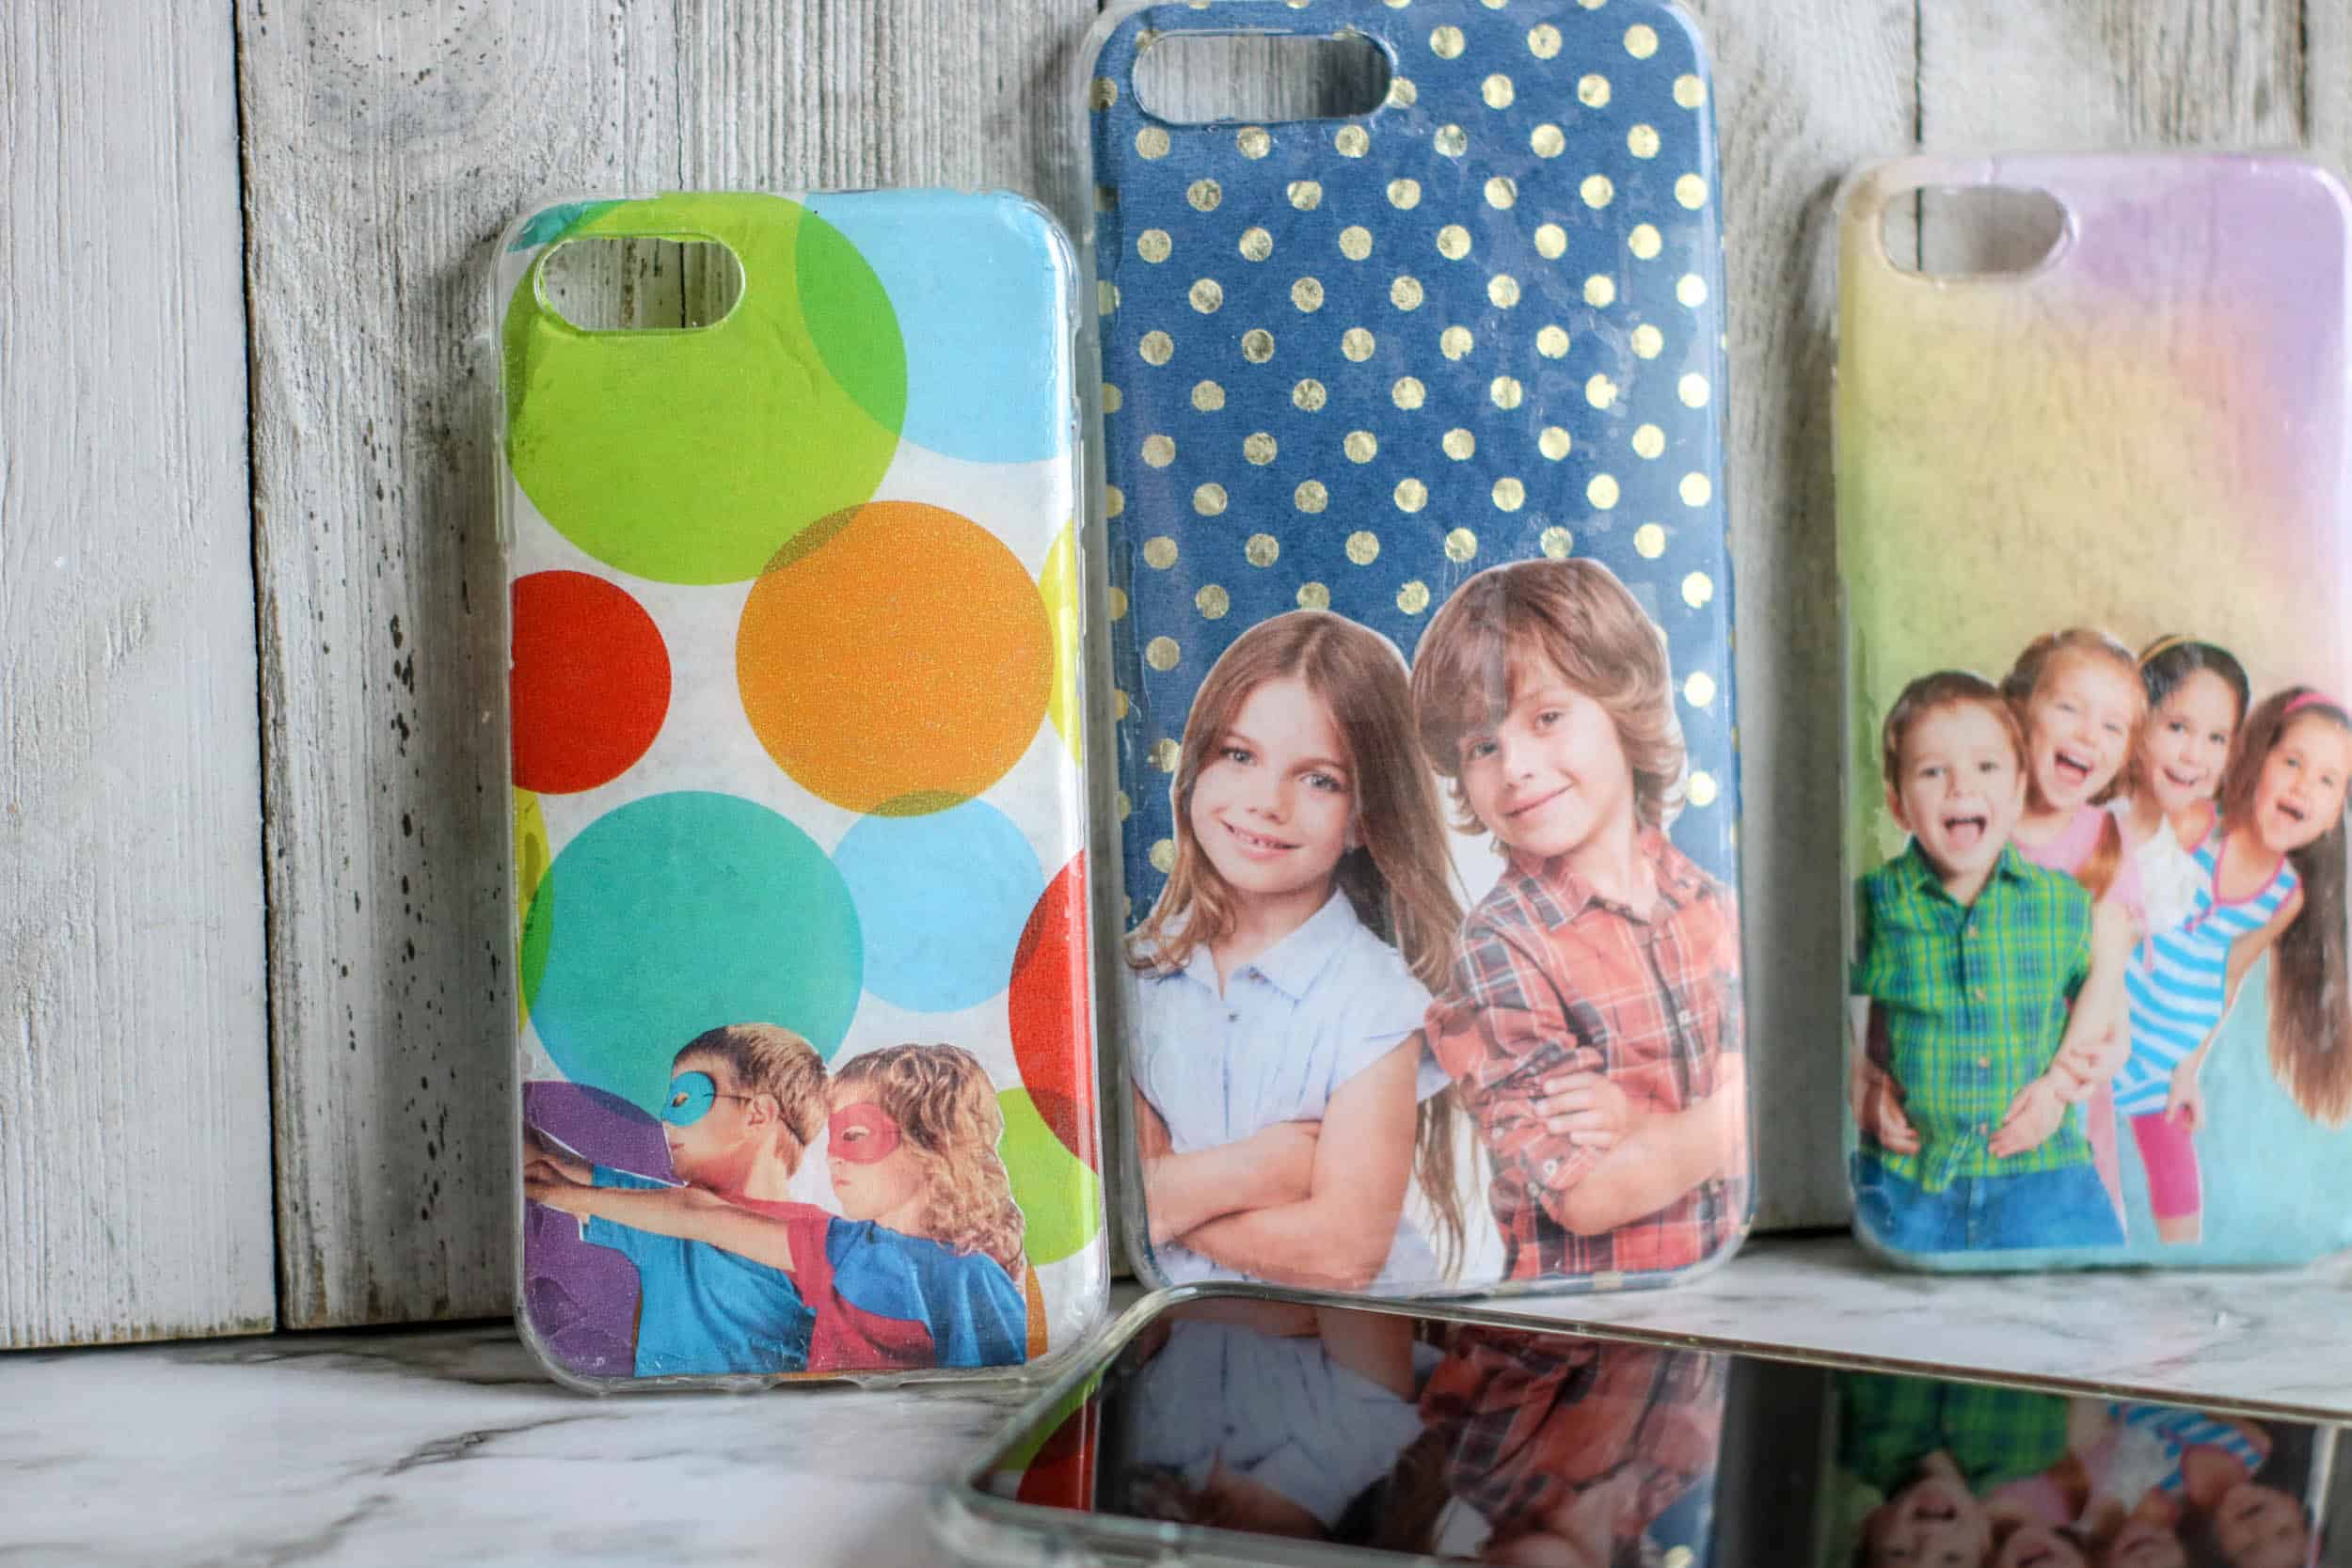 This easy DIY will show you how to make a custom case without spending much. It’s a great Father’s Day gift that kids can help customize for Dad.
Depending on the photos and tissue paper you use, the possibilities are endless. We are featuring this DIY for Father’s Day, but a personalized cell phone case is a great graduation or birthday gift. It’s also an inexpensive project that will keep kids busy. You can easily find clear cases for less than $5, and on Amazon I even saw a few under $1. It all depends on the cell phone model.
How to make personalized cell phone cases
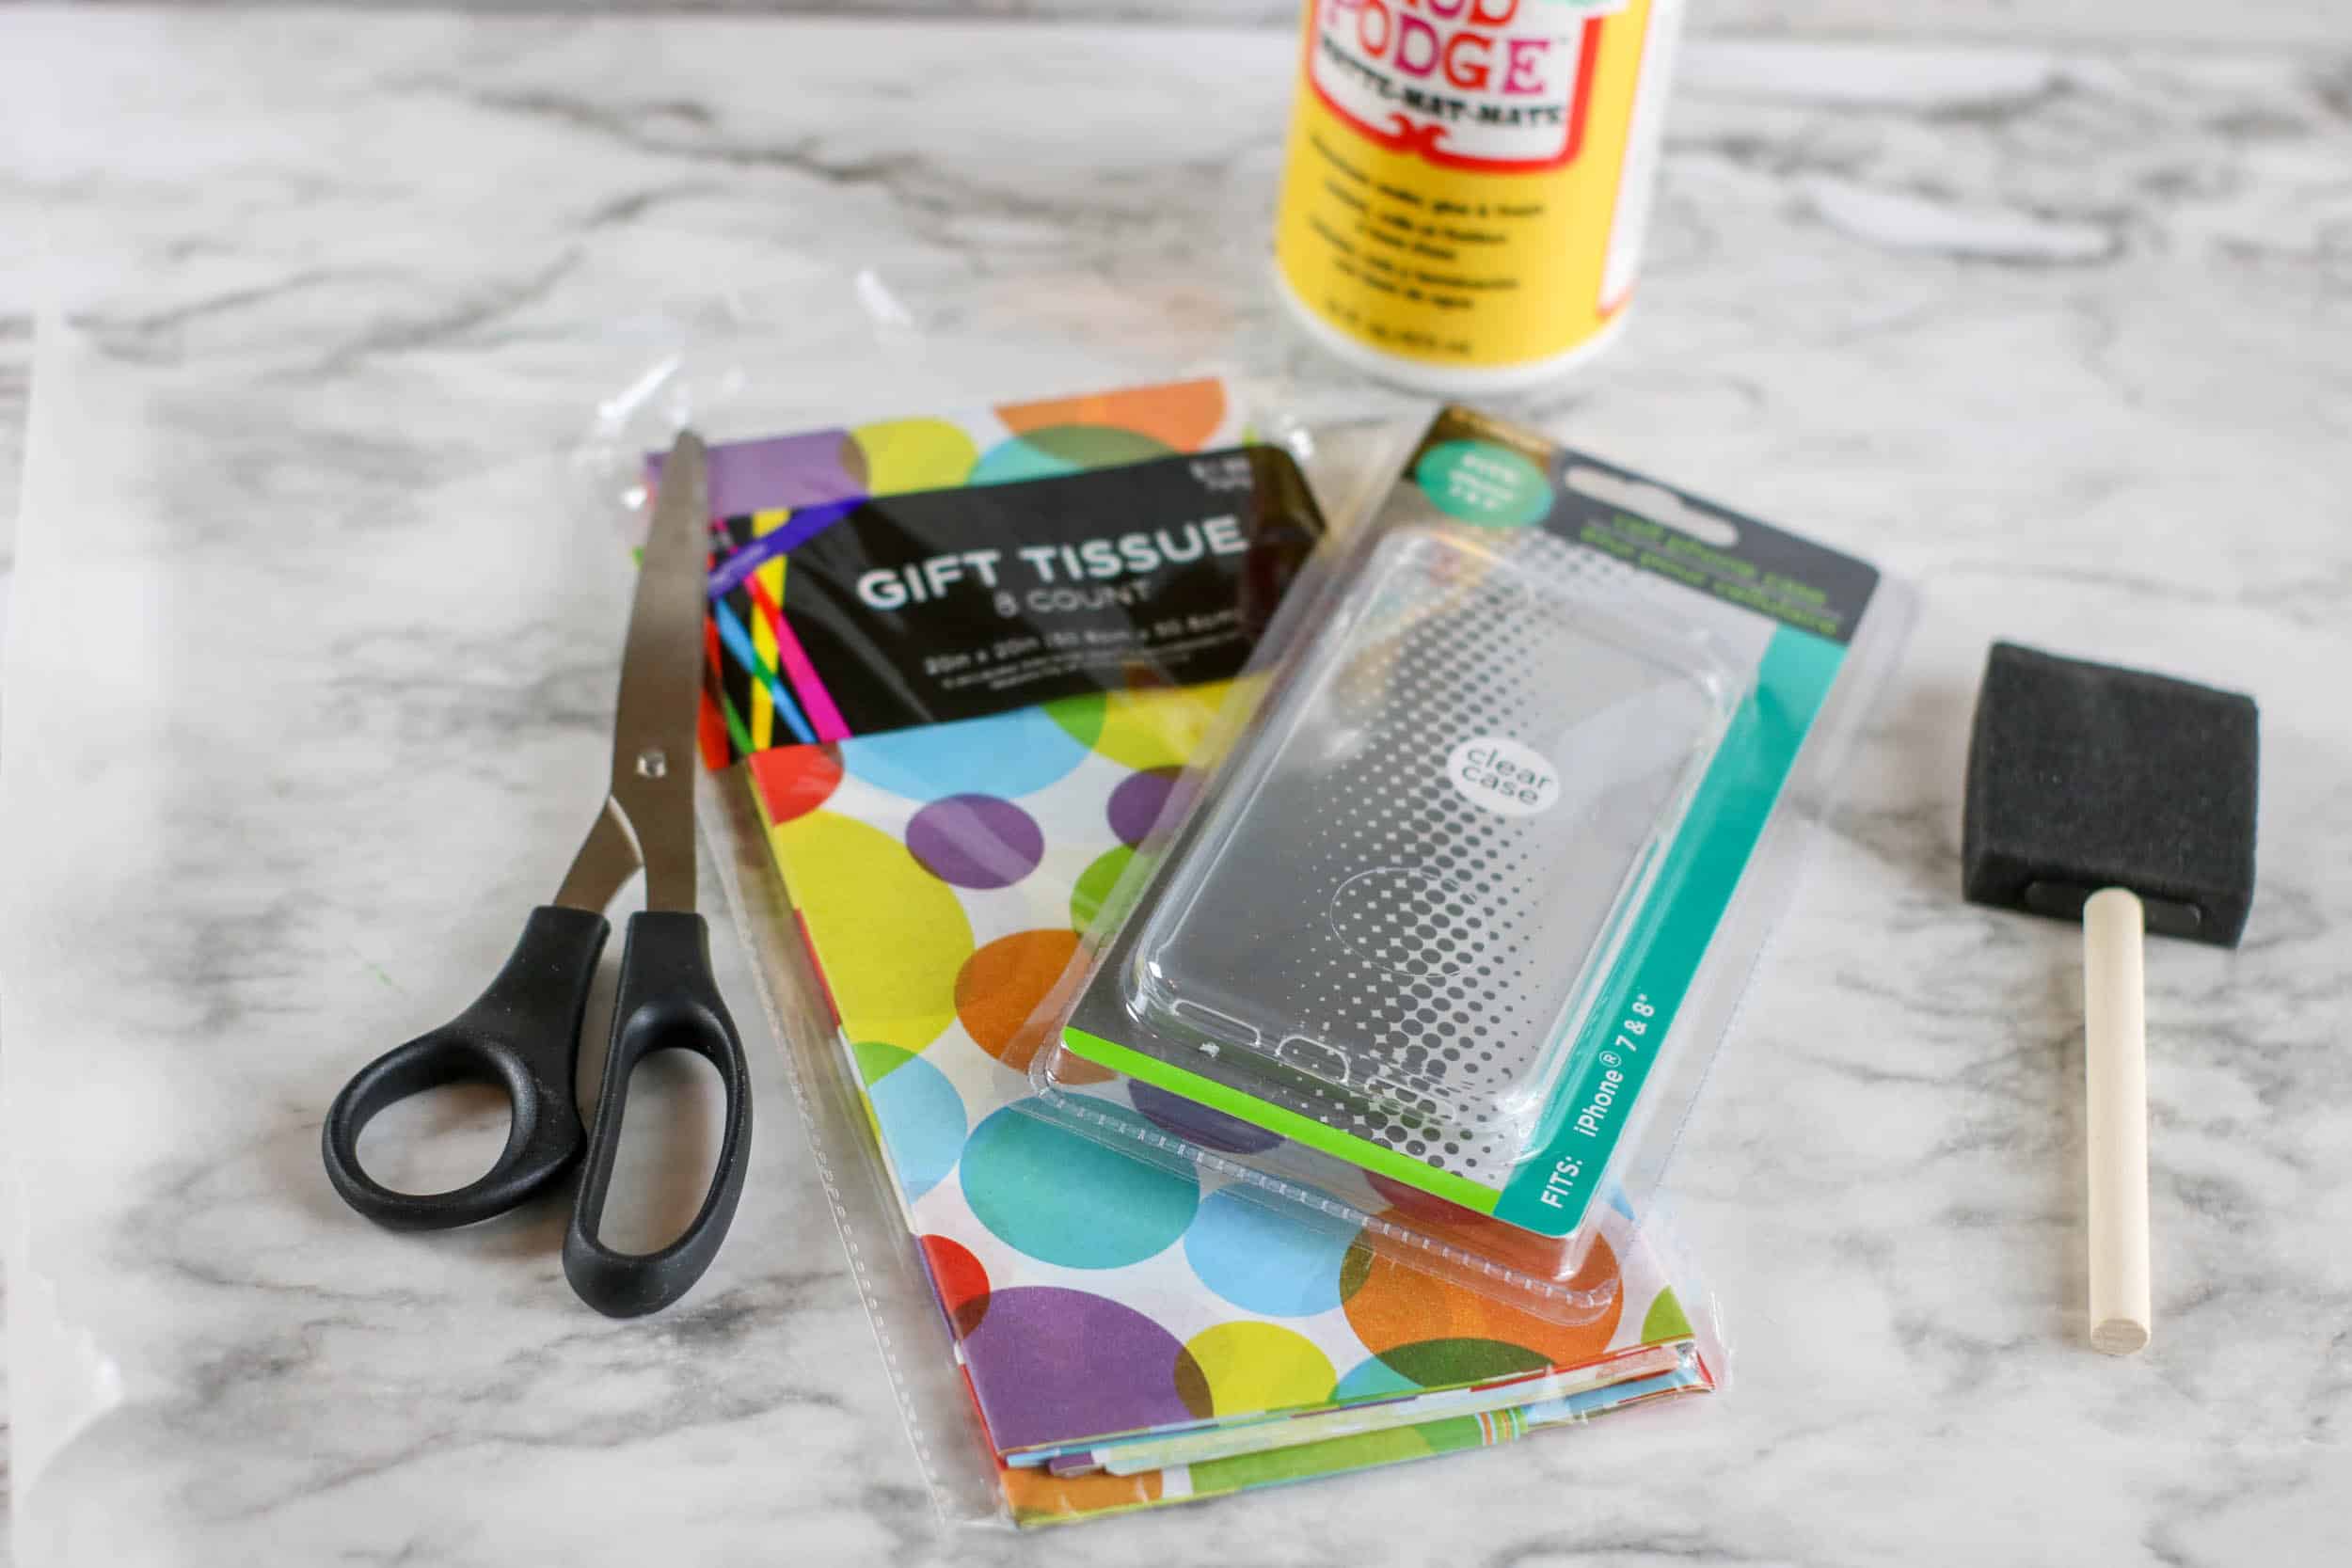 You will need:
- Printer paper
- Tissue paper (you can also use a metallic tissue paper like this one)
- Mod Podge in matte
- Paint brush
- Clear silicone cell phone cover (available online at Amazon, at local stores or Dollar Tree)
- Ruler
- Scissors and/or craft knife
Instructions
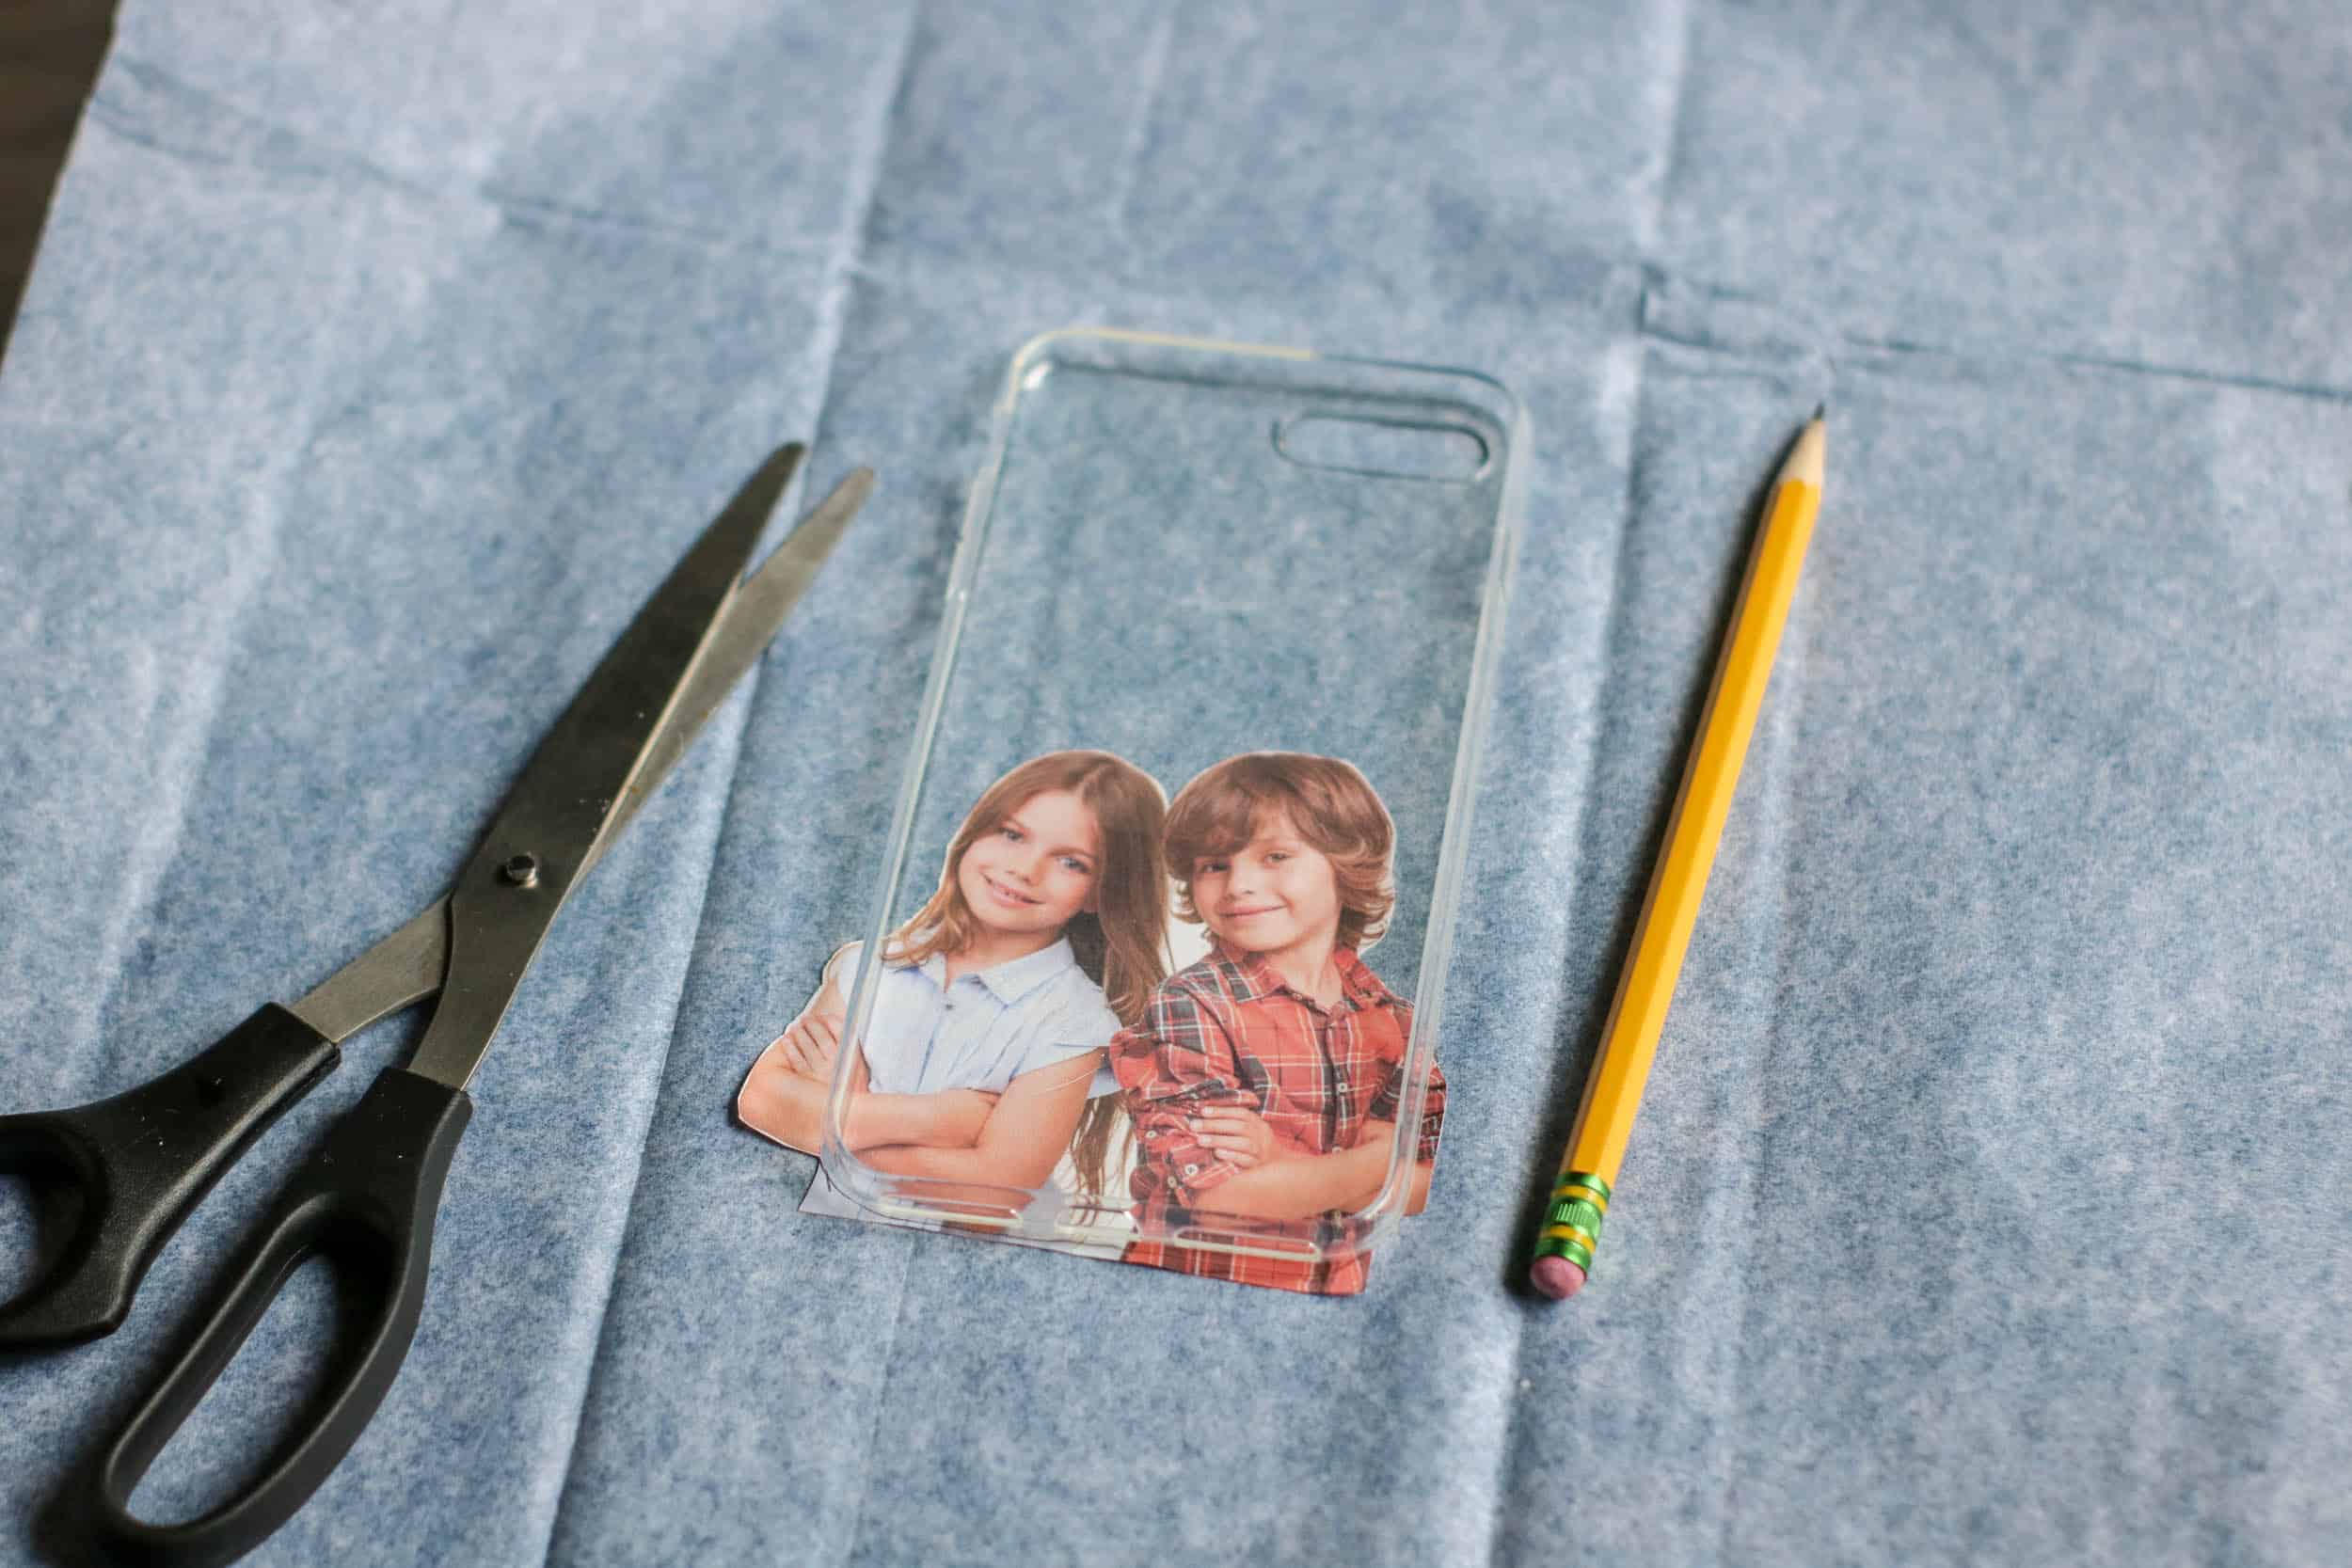
- Measure the cell phone case. Print picture to fit the case. Place cell phone case over picture to check placement of the image and trim picture if needed.
- Place cell phone case over tissue paper and trace. Cut tissue paper to fit the cell phone case.
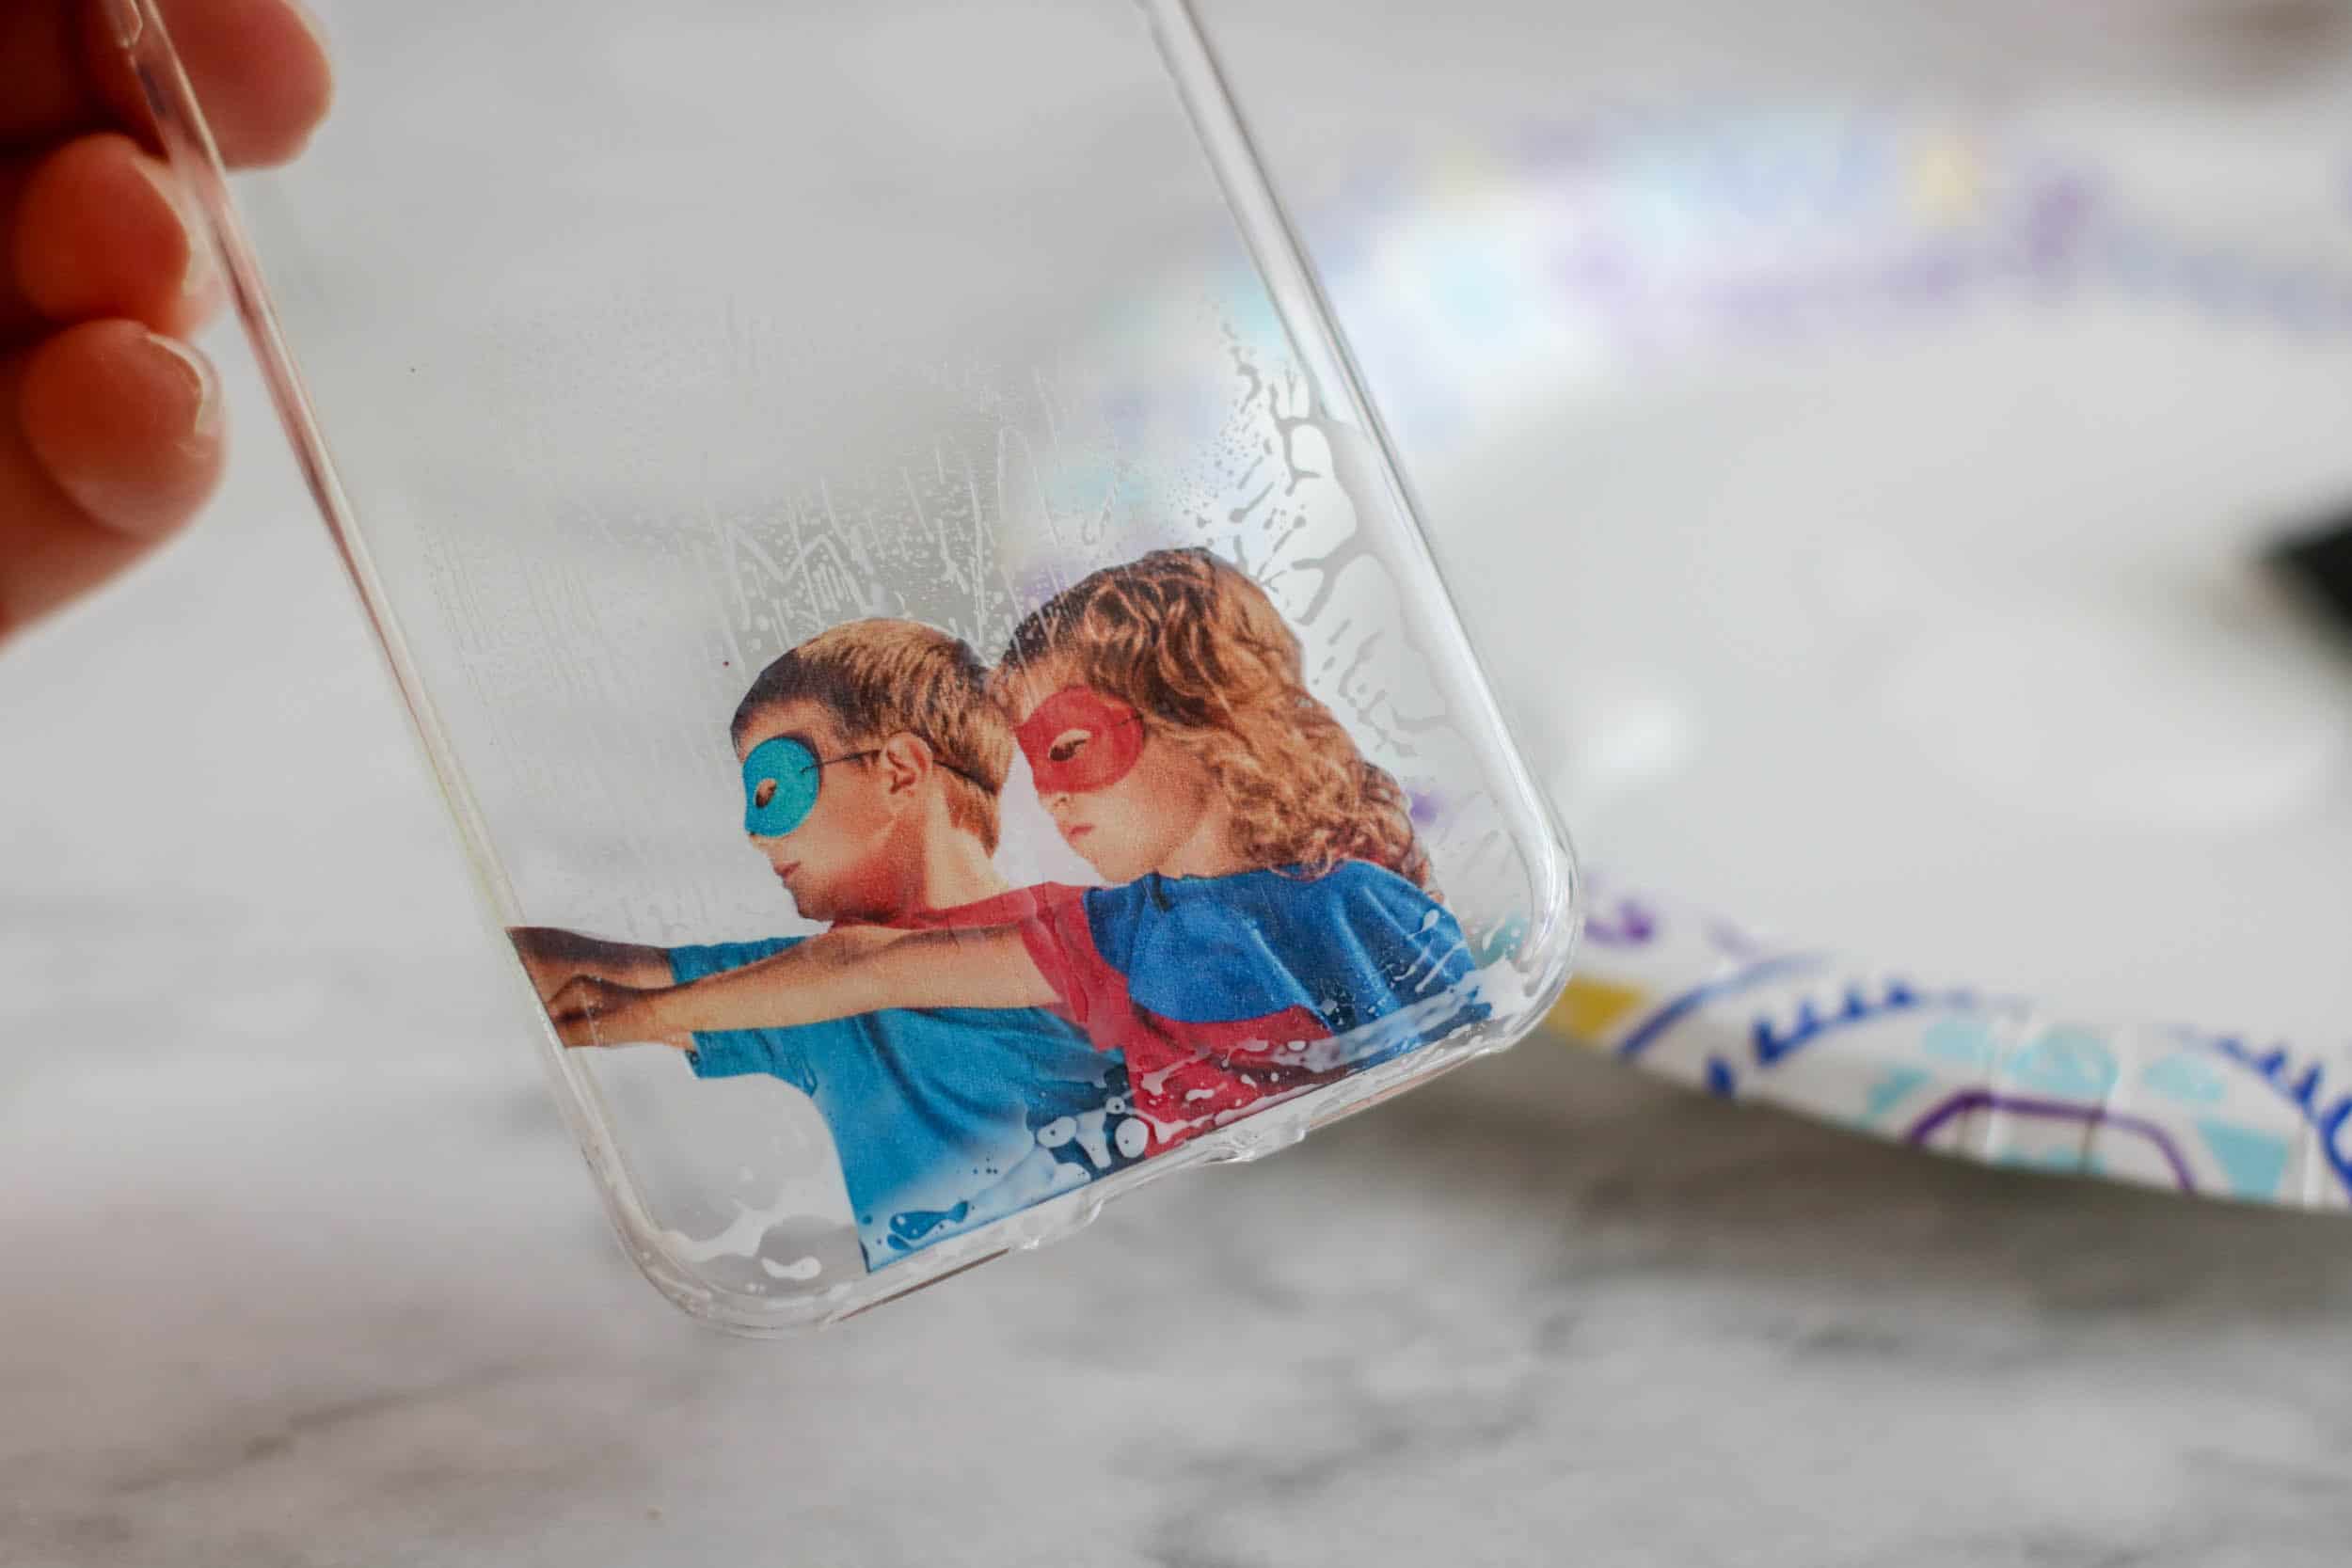
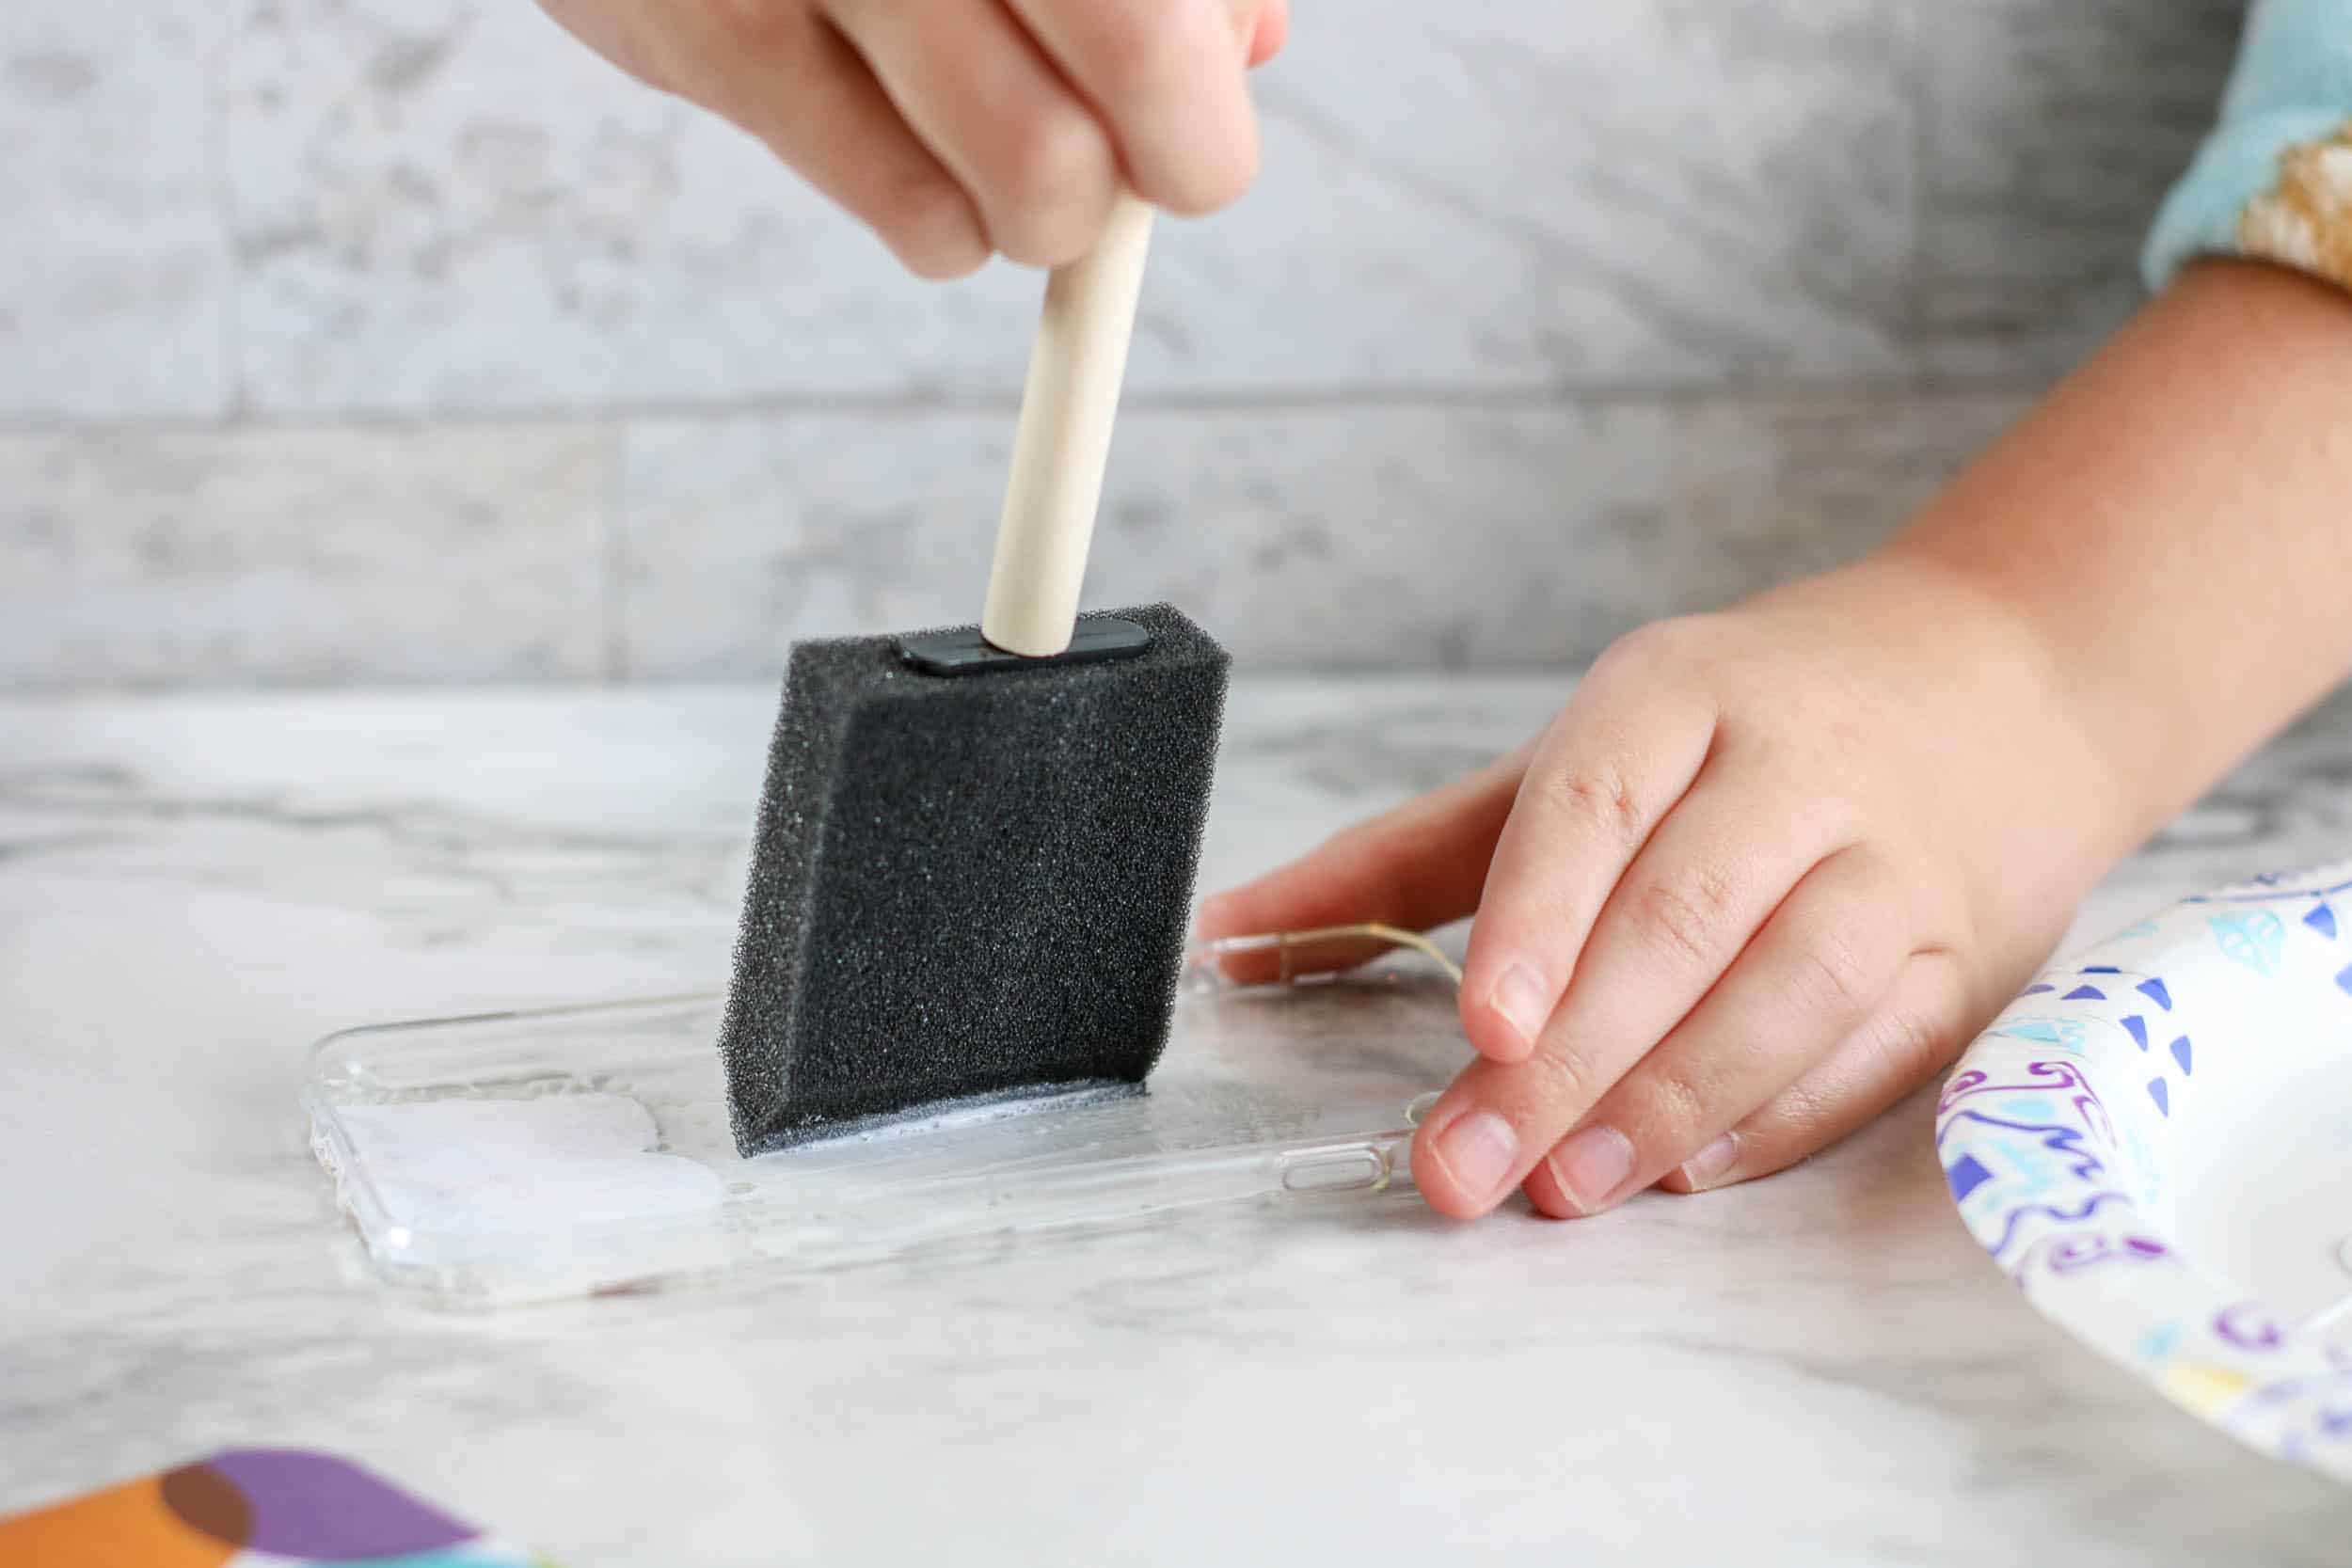
- Apply a thin layer of Mod Podge to the inside of the phone case where the picture will be placed. Arrange the picture over the glue with the image facing through the cell phone case.

- Apply another thin layer of Mod Podge over the picture. Press the tissue into the cell phone case.
- Allow the glue to dry completely. Use a craft knife to trim any spaces around the camera or other buttons.
I would love to see what you create and how your personalized cell phone cases look like!

DIY: how to make personalized cell phone cases
Active Time
10 minutes
Total Time
10 minutes
Estimated Cost
$4
Materials
- • Printer paper
- • Tissue paper (you can also use a metallic tissue paper like this one)
- • Modge Podge in matte
- • Paint brush
- • Clear silicone cell phone cover (available online at Amazon, at local stores or Dollar Tree)
- • Ruler
- • Scissors and/or craft knife
Instructions
- Measure the cell phone case. Print picture to fit the case. Place cell phone case over picture to check placement of the image and trim picture if needed.
- Place cell phone case over tissue paper and trace. Cut tissue paper to fit the cell phone case.
- Apply a thin layer of Modge Podge to the inside of the phone case where the picture will be placed. Arrange the picture over the glue with the image facing through the cell phone case.
- Apply another thin layer of Modge Podge over the picture. Press the tissue into the cell phone case.
- Allow the glue to dry completely. Use a craft knife to trim any spaces around the camera or other buttons.