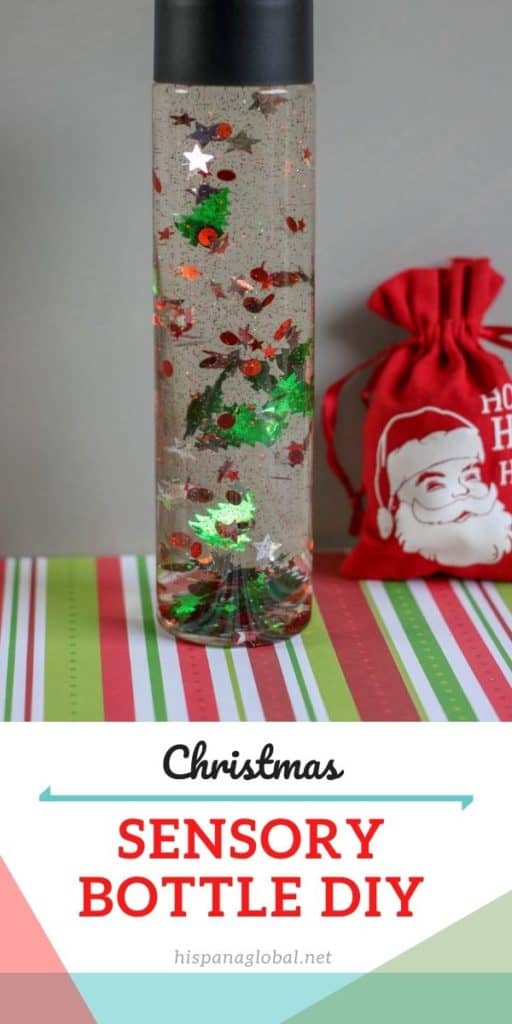
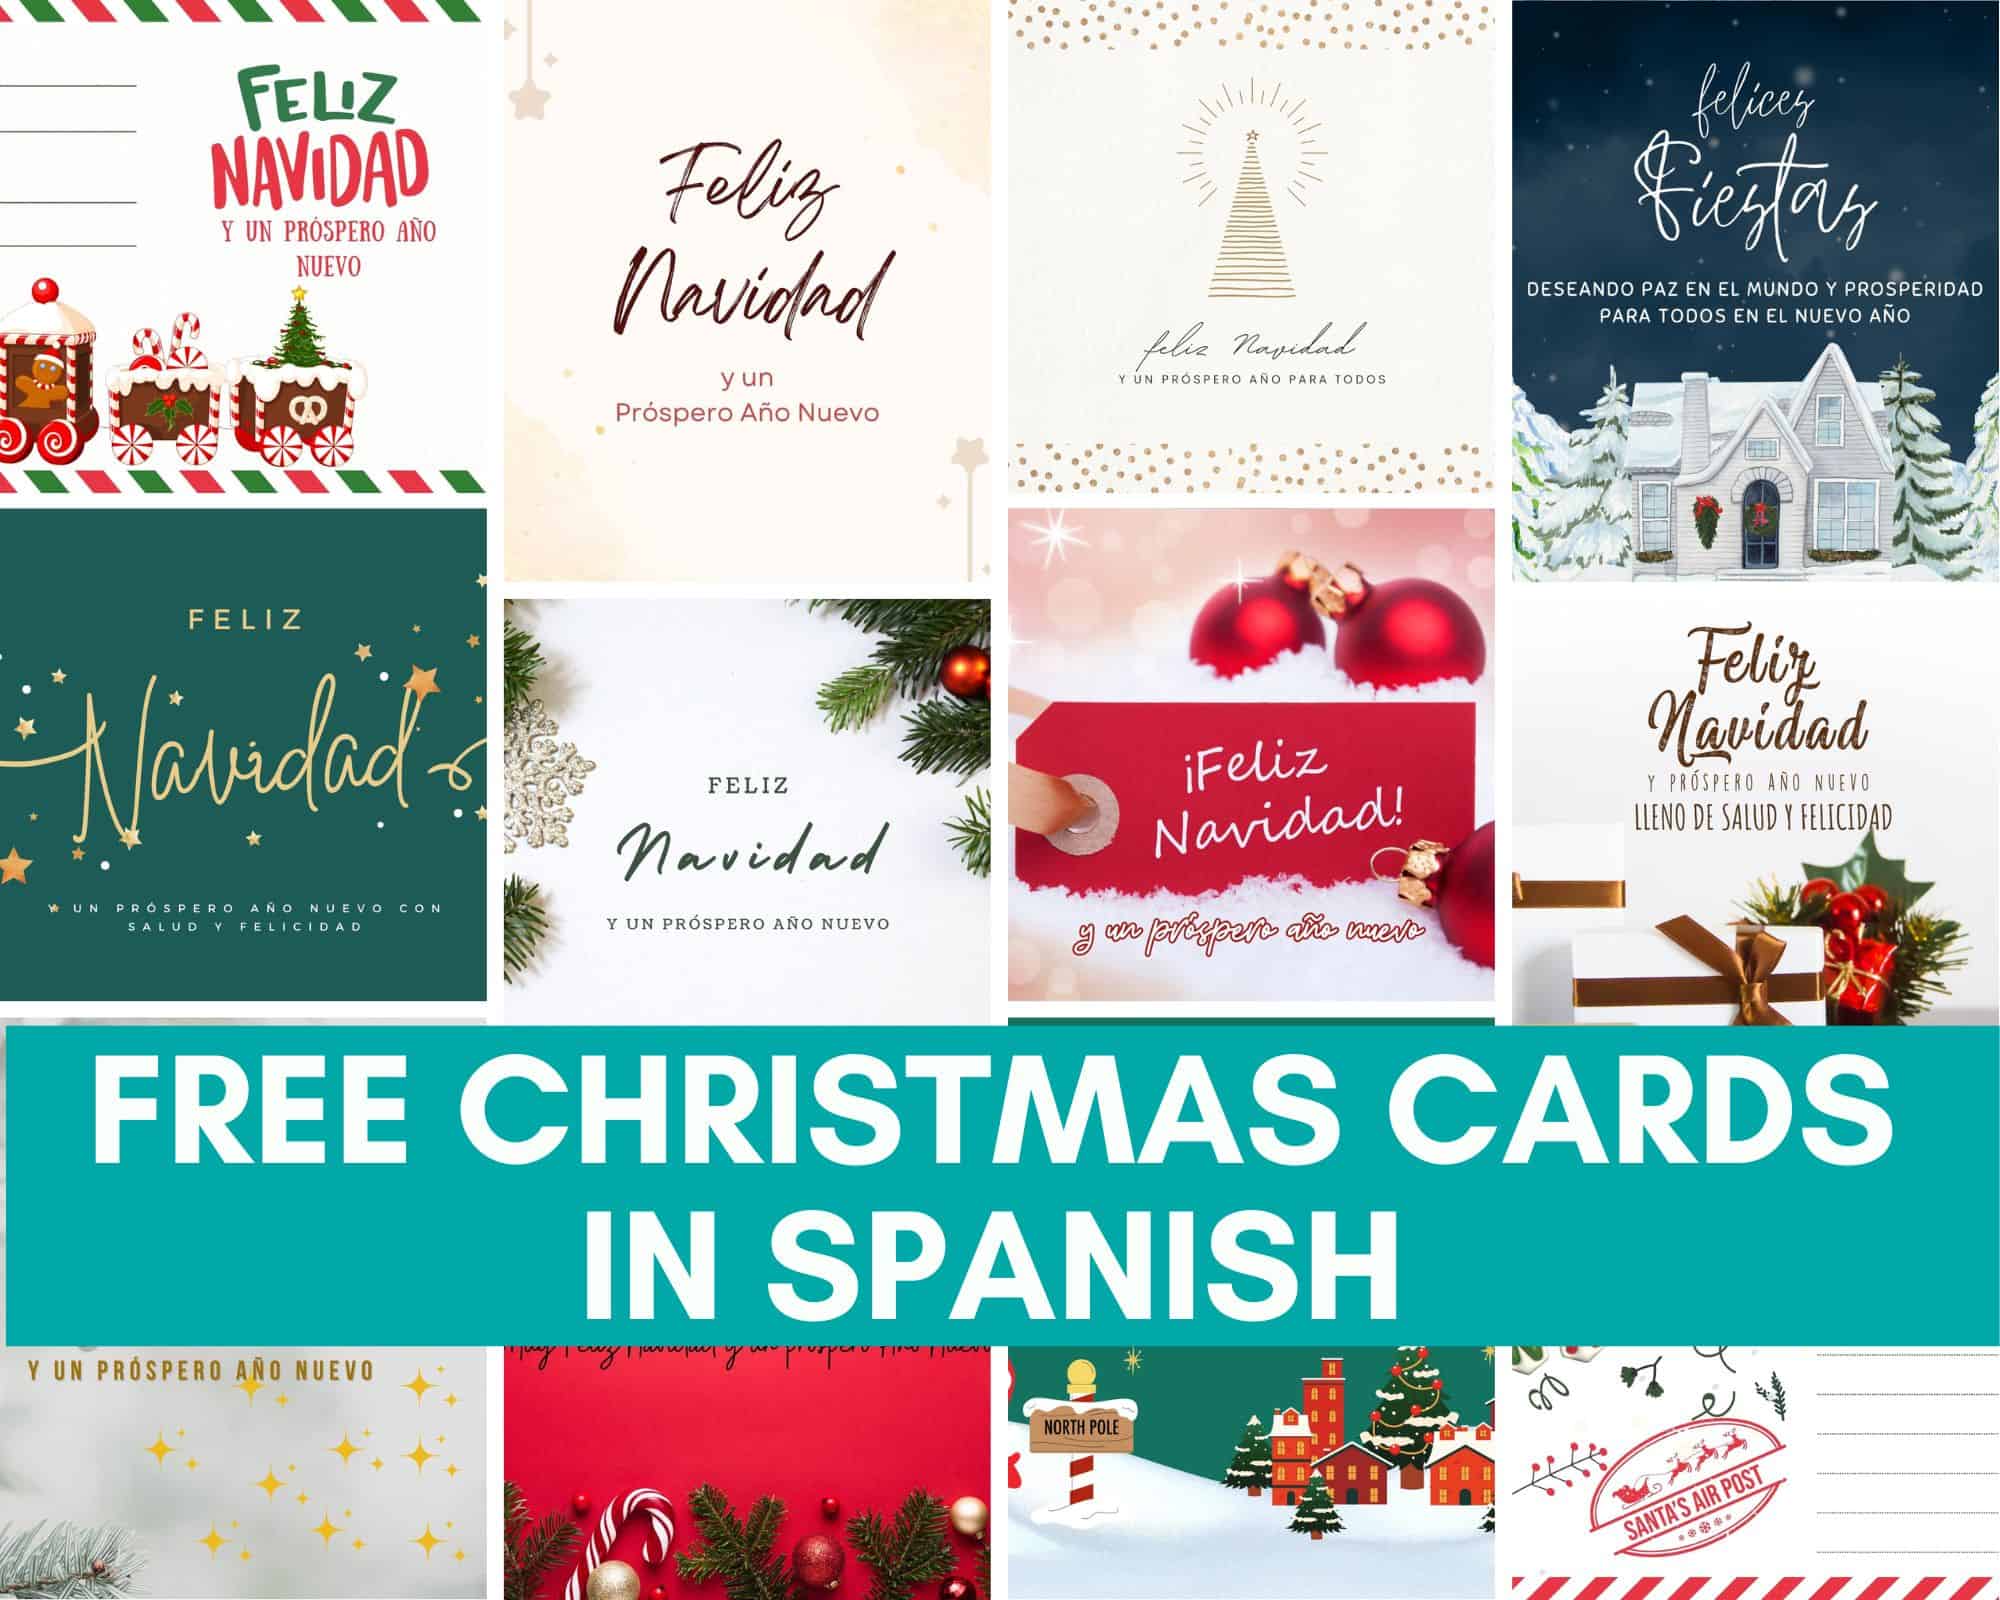
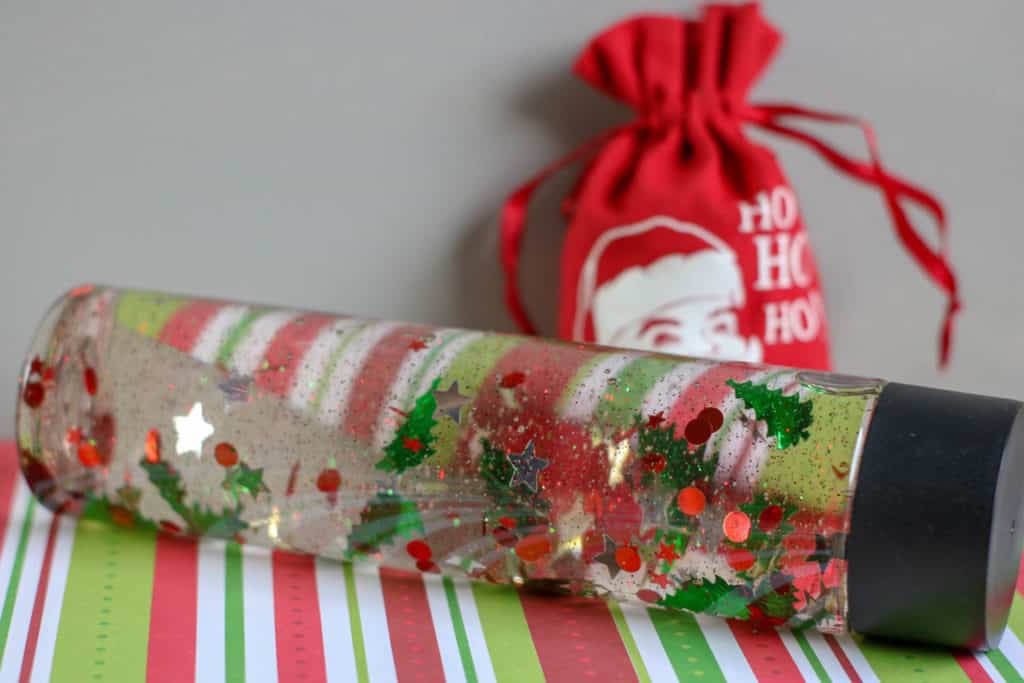
Christmas Sensory Bottle
This fun Christmas craft is part science experiment and part holiday magic, It’s a next-level take on snow globes that is really fantastic at capturing a child’s imagination. This Christmas sensory bottle is very simple and easy to make so children can have fun for hours.
 The primary elements of the sensory bottle are glue water and glitter, but like beer, these basic ingredients can be augmented and built upon. For this craft, you will build your Christmas sensory bottle by using these foundational ingredients and experimenting with the viscosity of the resulting substance. In other words, you’ll play with the thickness of the liquid solution.
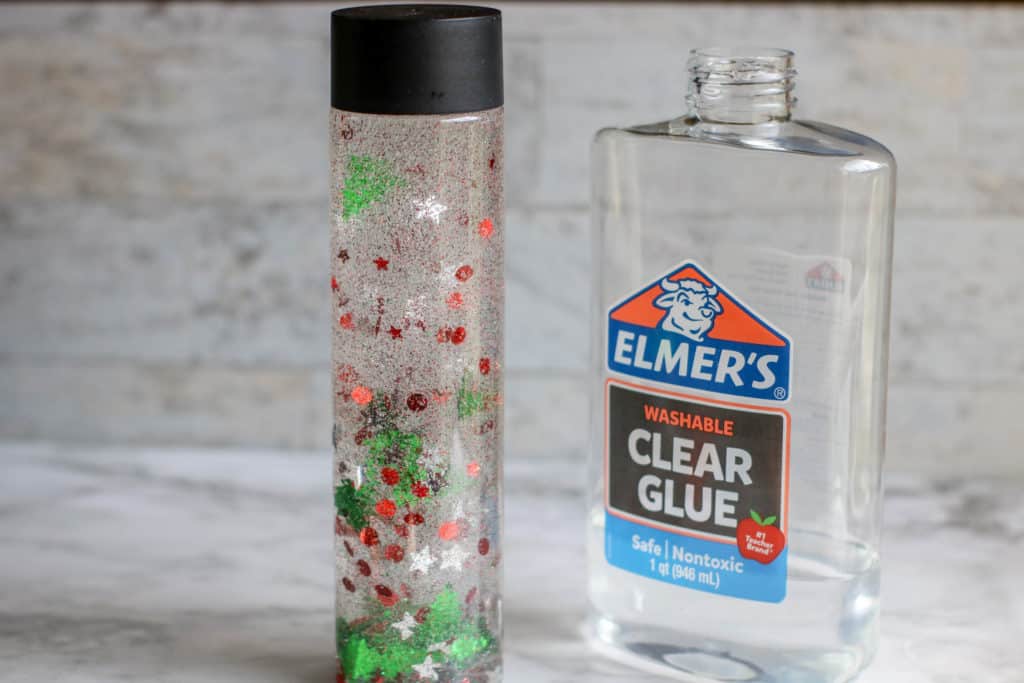
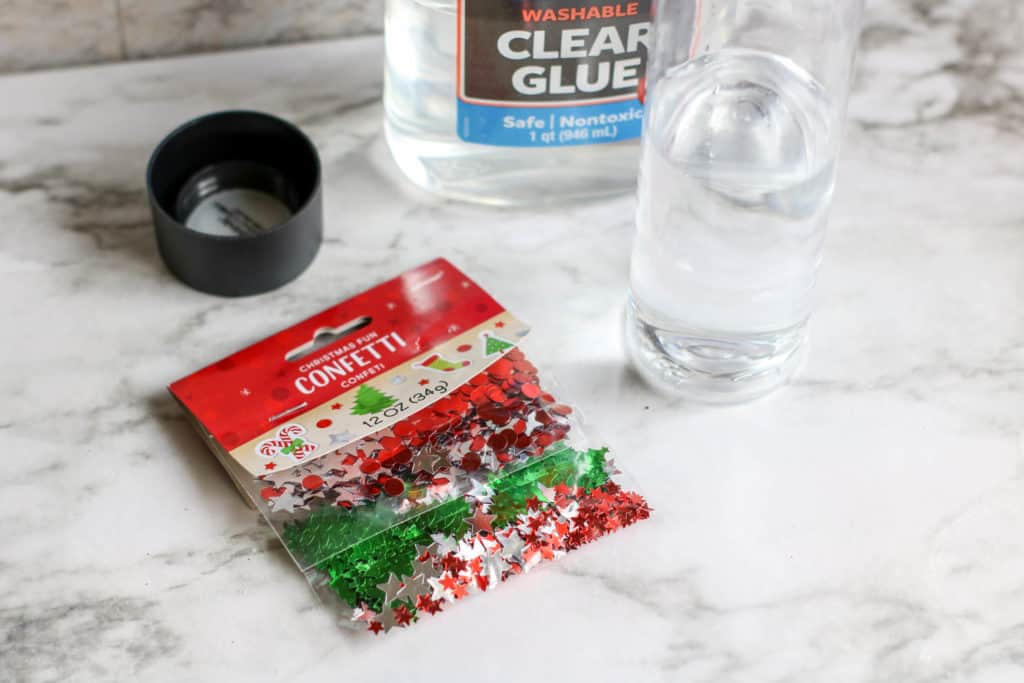
The best bottles to use for this experiment are cylindrical. You want a more jar-like lid to make it easier to add ingredients and mix as you go. A wide mouth with a screw-on cap is preferred. The type of specific bottle we used resembles a Voss water bottle. You can find this style at crafting stores and on Amazon. The Amazon bottles have a link below. It’s also important that you use clear glue in this craft and I have provided a link below to the glue we used as well.
Fun with a Sensory Bottle
The intriguing effect of this Christmas sensory bottle craft is the slow-moving glittery fluid that sloshes around inside the container. You can use additional ingredients to increase the complexity of the mixture. Among popular choices are small plastic toys and confetti. To make the craft Christmas themed incorporate red and green in your color scheme and use toys such as reindeer, snowmen, or even Christmas ornaments you don’t mind sacrificing for the sake of science. Try to select edgier toys with dynamic shapes. This will increase the effects of the glittery mixture as it moves around them in the bottle.
Christmas Sensory Bottle
 You Will Need:
 You Will Need:
(We get a small comission from these affiliate links at no extra cost to you)
- 1 (16 ounce) plastic storage/sensory bottle (available at Michaels or similar but smaller here: https://amzn.to/2HOHbQw )
- 2 to 3 (6 ounce) bottles Elmer’s Glue in clear
- About 1 cup warm water
- About 1 tablespoon glitter or confetti (if desired)
- Toys (if desired)
For this project, we used:
Directions
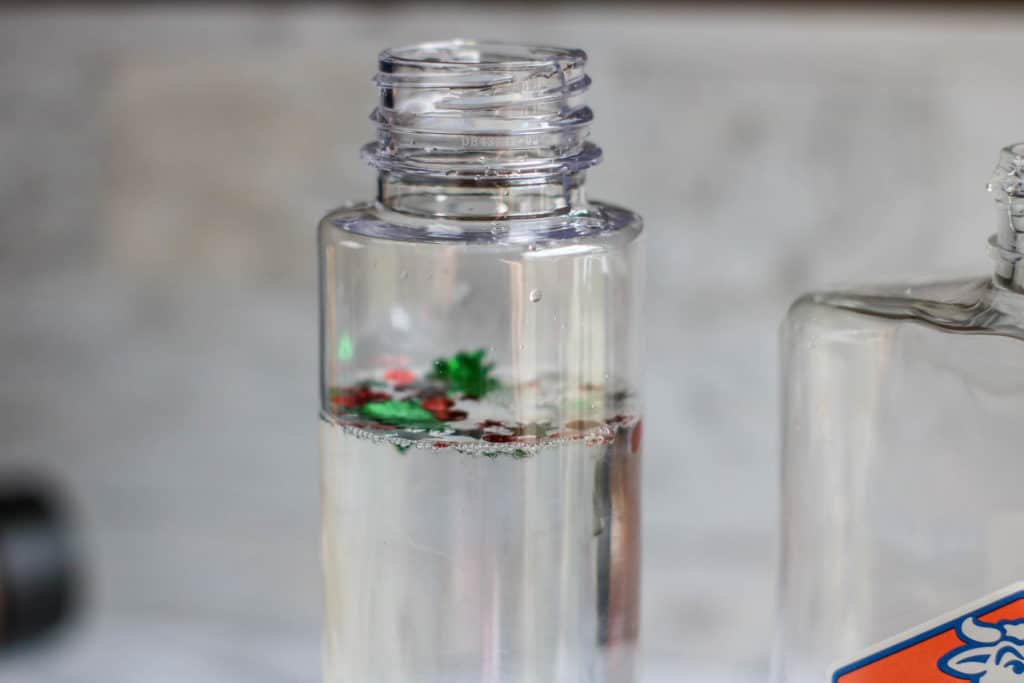
- Empty one bottle of glue into 16 oz bottle.
- Fill the empty glue bottle about half full with warm water (about ¼ cup) and seal with the lid. Shake well to combine the remaining glue with the water. Pour into jar with glue and shake or stir to combine.
- If you are adding glitter or toys, add part of the glitter and toys into the glue mixture.
- Seal the jar and shake well. If the glitter or confetti does not move easily, add more warm water. If the glitter or confetti moves too quickly, add additional glue.
- Continually add in layers with the glitter and toys until you achieve your desired effect.
- When the contents of the bottle move according to your preference, seal the bottle and glue the lid closed to avoid spills.
- If desired, cover the lid with duct tape or additional decorations.